

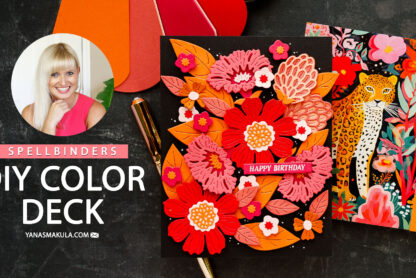
Hello friends! Welcome (or welcome back!) to my blog. I’m so thrilled to hear how much you’re loving my Yana’s Daisies collection with Spellbinders – your kind words and support truly mean the world to me. You inspire me to keep creating and dreaming up beautiful things to share with you!
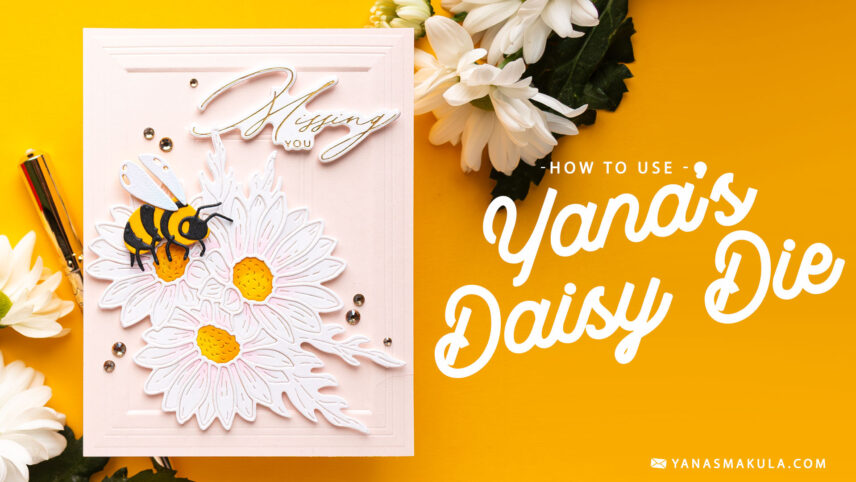
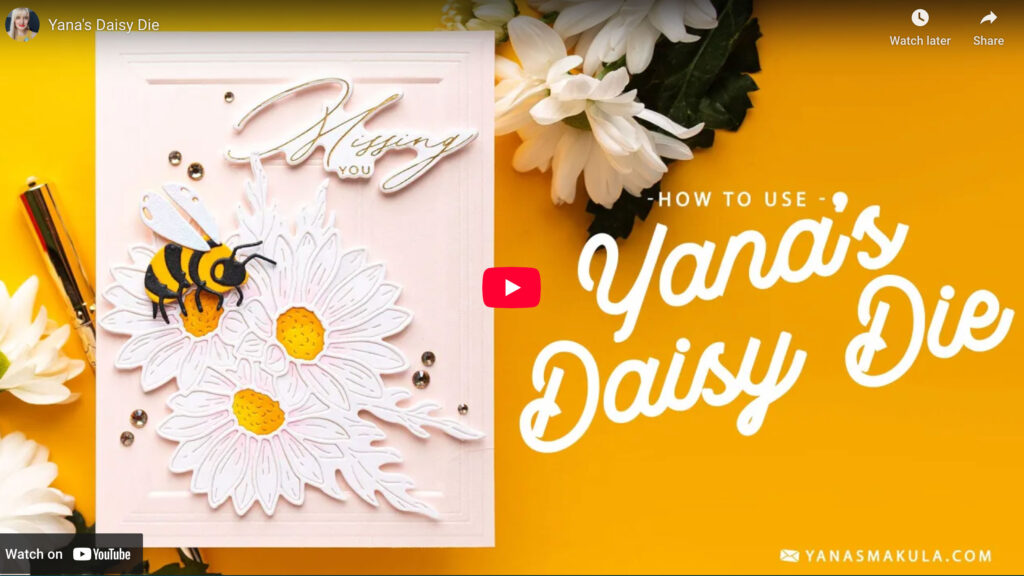
Today I want to take you on a deep dive into one of the key pieces in this collection – the Yana’s Daisy Die. This post is a companion to my video tutorial, where I walk you through the die step-by-step and show you my favorite ways to use it. So let’s jump right in!
YANA’S DAISY DIE
The Yana’s Daisy Die is designed in the same style as my previous florals with Spellbinders – if you’ve used the Magnolia, Anemone, Peony, Poppy, Amaryllis, and Poinsettia dies, this one will feel very familiar. If you’re brand new to my florals, don’t worry – I have plenty of tutorials to help you get started.
The die includes:
-
A main detail + outline die
-
A shadow die
You can use just the main die on its own, or combine it with the shadow layer for added dimension.
A Quick Tip! Avoid cutting both dies together – that combination will result in a cut that won’t work well for layering. Instead, cut them separately and layer for best results.
HOW TO USE YANA’S DAISY DIE
Watch the video below or on my YouTube channel:
LAYERING & ASSEMBLY IDEAS
I love using vellum for the shadow layer – it creates a soft, airy feel. You can also use white smooth or textured cardstock for a bit more definition.
The outline layer serves multiple purposes – I like to pop out the petal pieces and keep just the delicate frame, which I layer over a contrasting piece for dimension/contrast. You can achieve a completely different look just by mixing and matching paper types and colors!
Note: The leaves are part of the main die and not separate. So if you’d like them to be a different color than the flower, simply color them with markers.
COLORING & CUSTOMIZATION TECHNIQUES
There are several ways to bring your daisy die cuts to life. Here are a few of my go-to techniques:
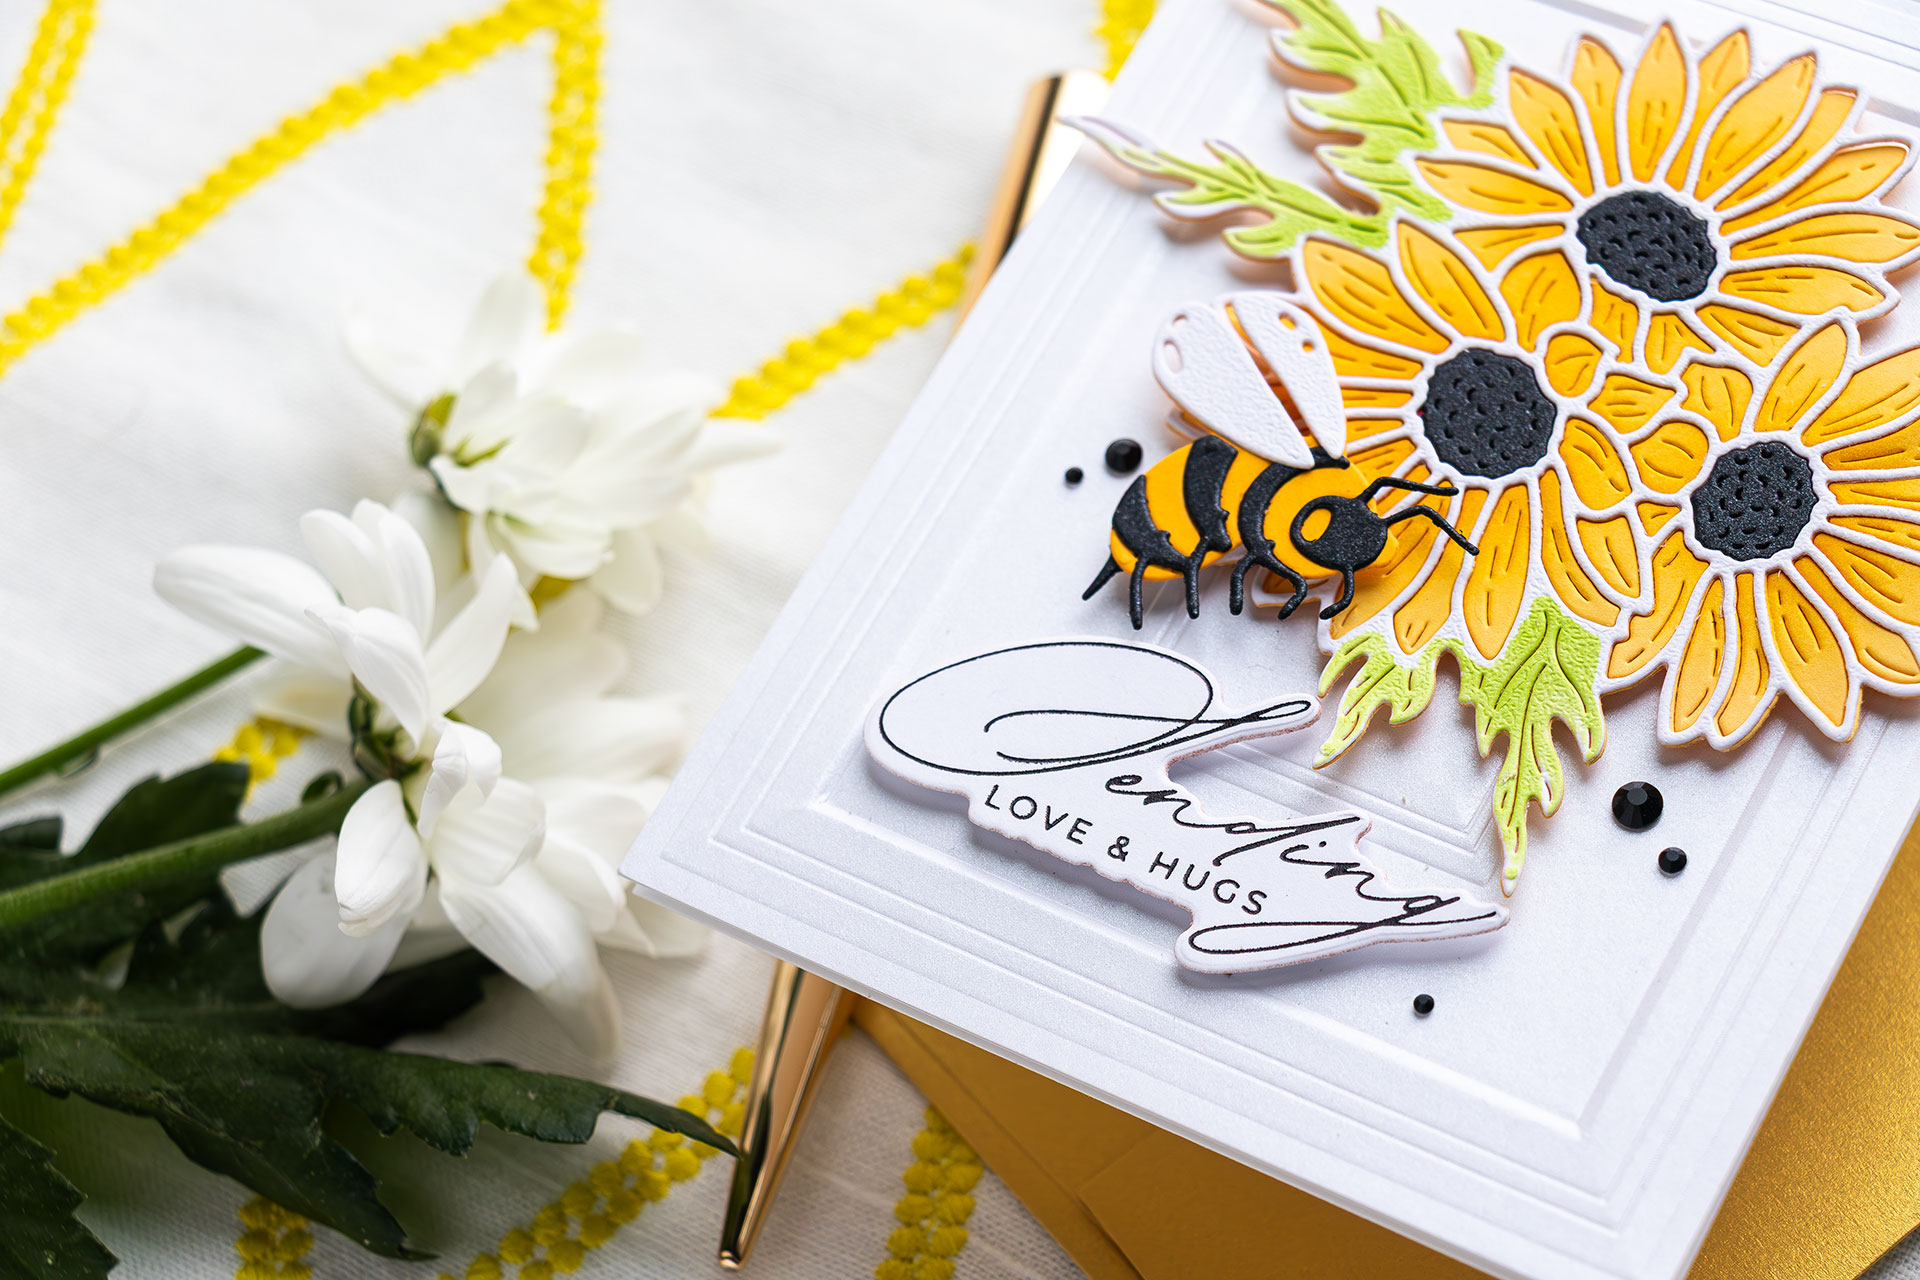
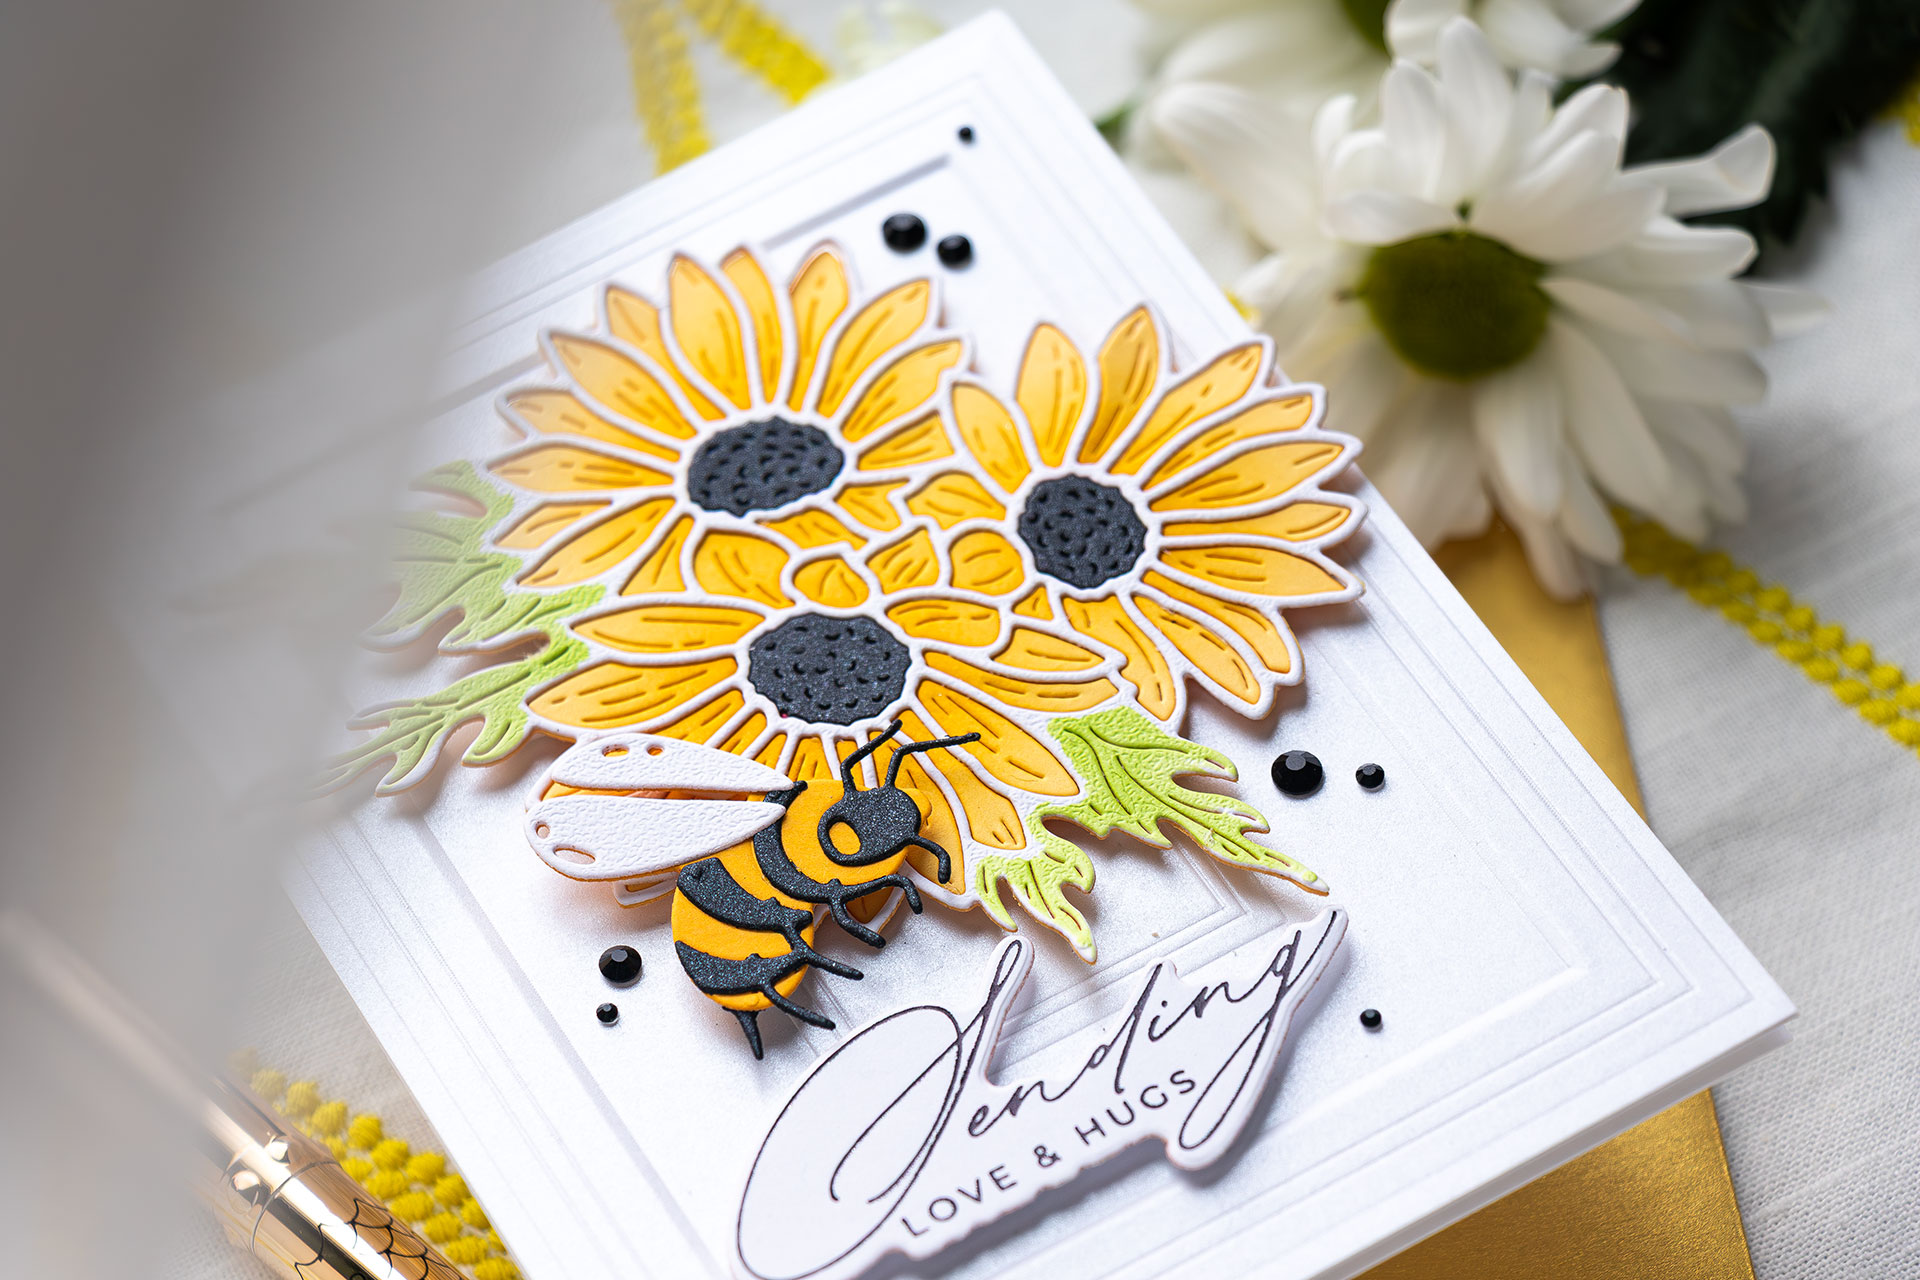
1. Cut From Colored Cardstock
This is one of the easiest ways to create vibrant daisies. I used Spellbinders Saffron cardstock and enhanced it with Copic markers (Y35, Y19, YR14) for extra shading. Colored cardstock reduces the amount of coloring needed, which is always a plus!
To keep the negative petal pieces from falling out, I tape the back with Best Ever Craft tape. Depending on your die-cutting machine, you may or may not need this step.
Additional products used: Molded Frame 3D embossing folder; Crafty Hugs sentiments; Brushed Black cardstock; Onyx gems
2. Ink Blending
If markers aren’t your thing, you can add color with a blending brush and ink. Use a small brush and start blending from the center out, or just the petal tips – totally up to you!

I used Beeswax cardstock and added ink blending with the Simon Says Stamp Citrine ink. The Brushed White cardstock was used for the background. The leaves were colored using YG03 Copic marker.
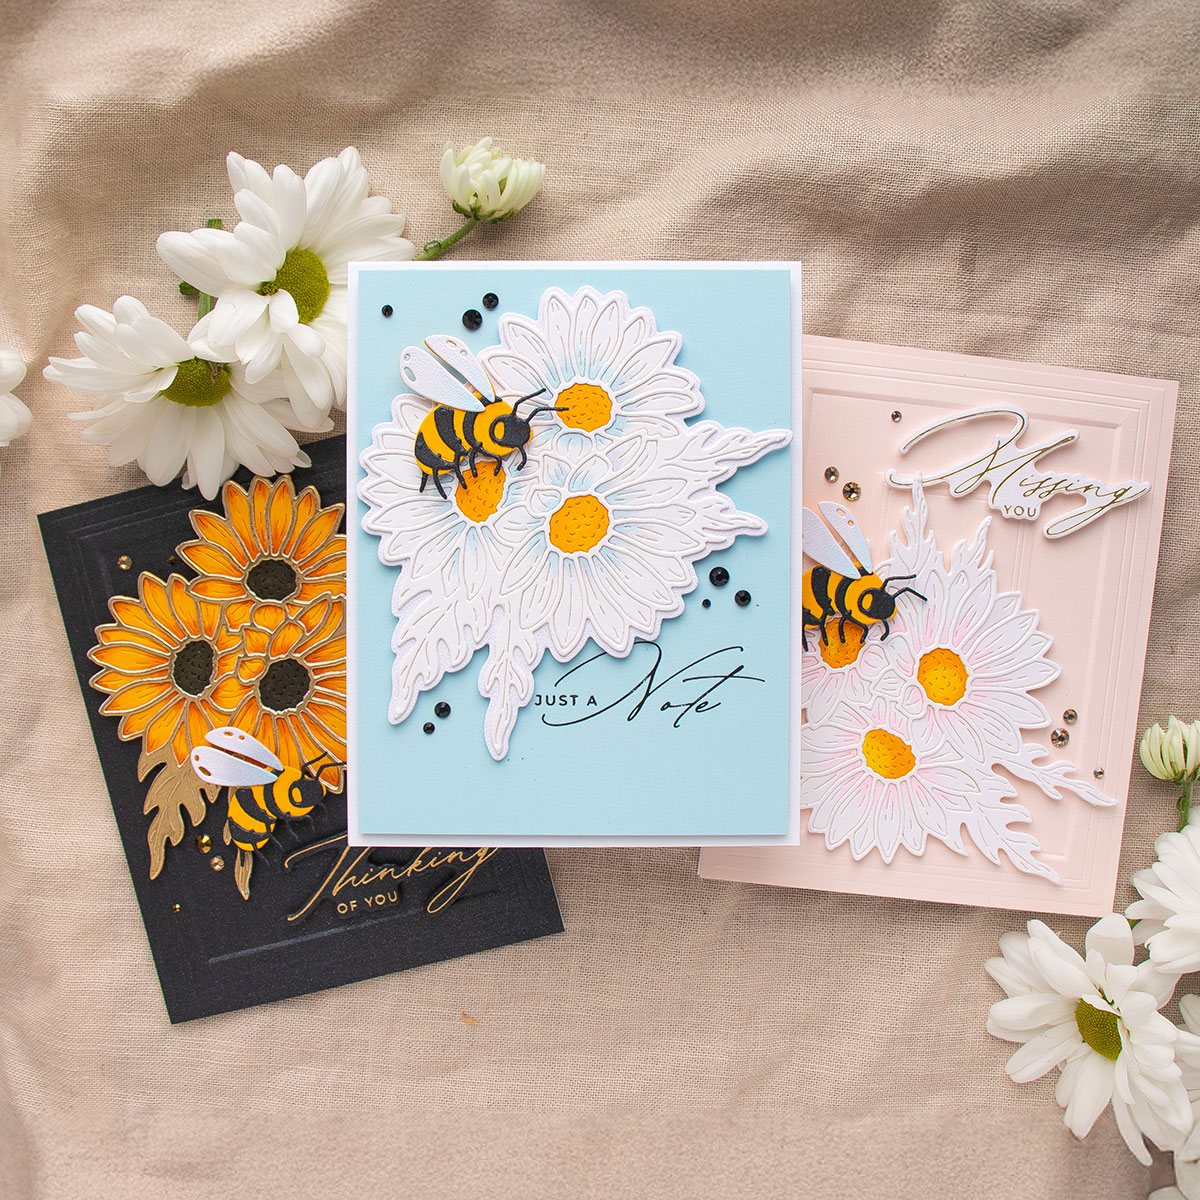
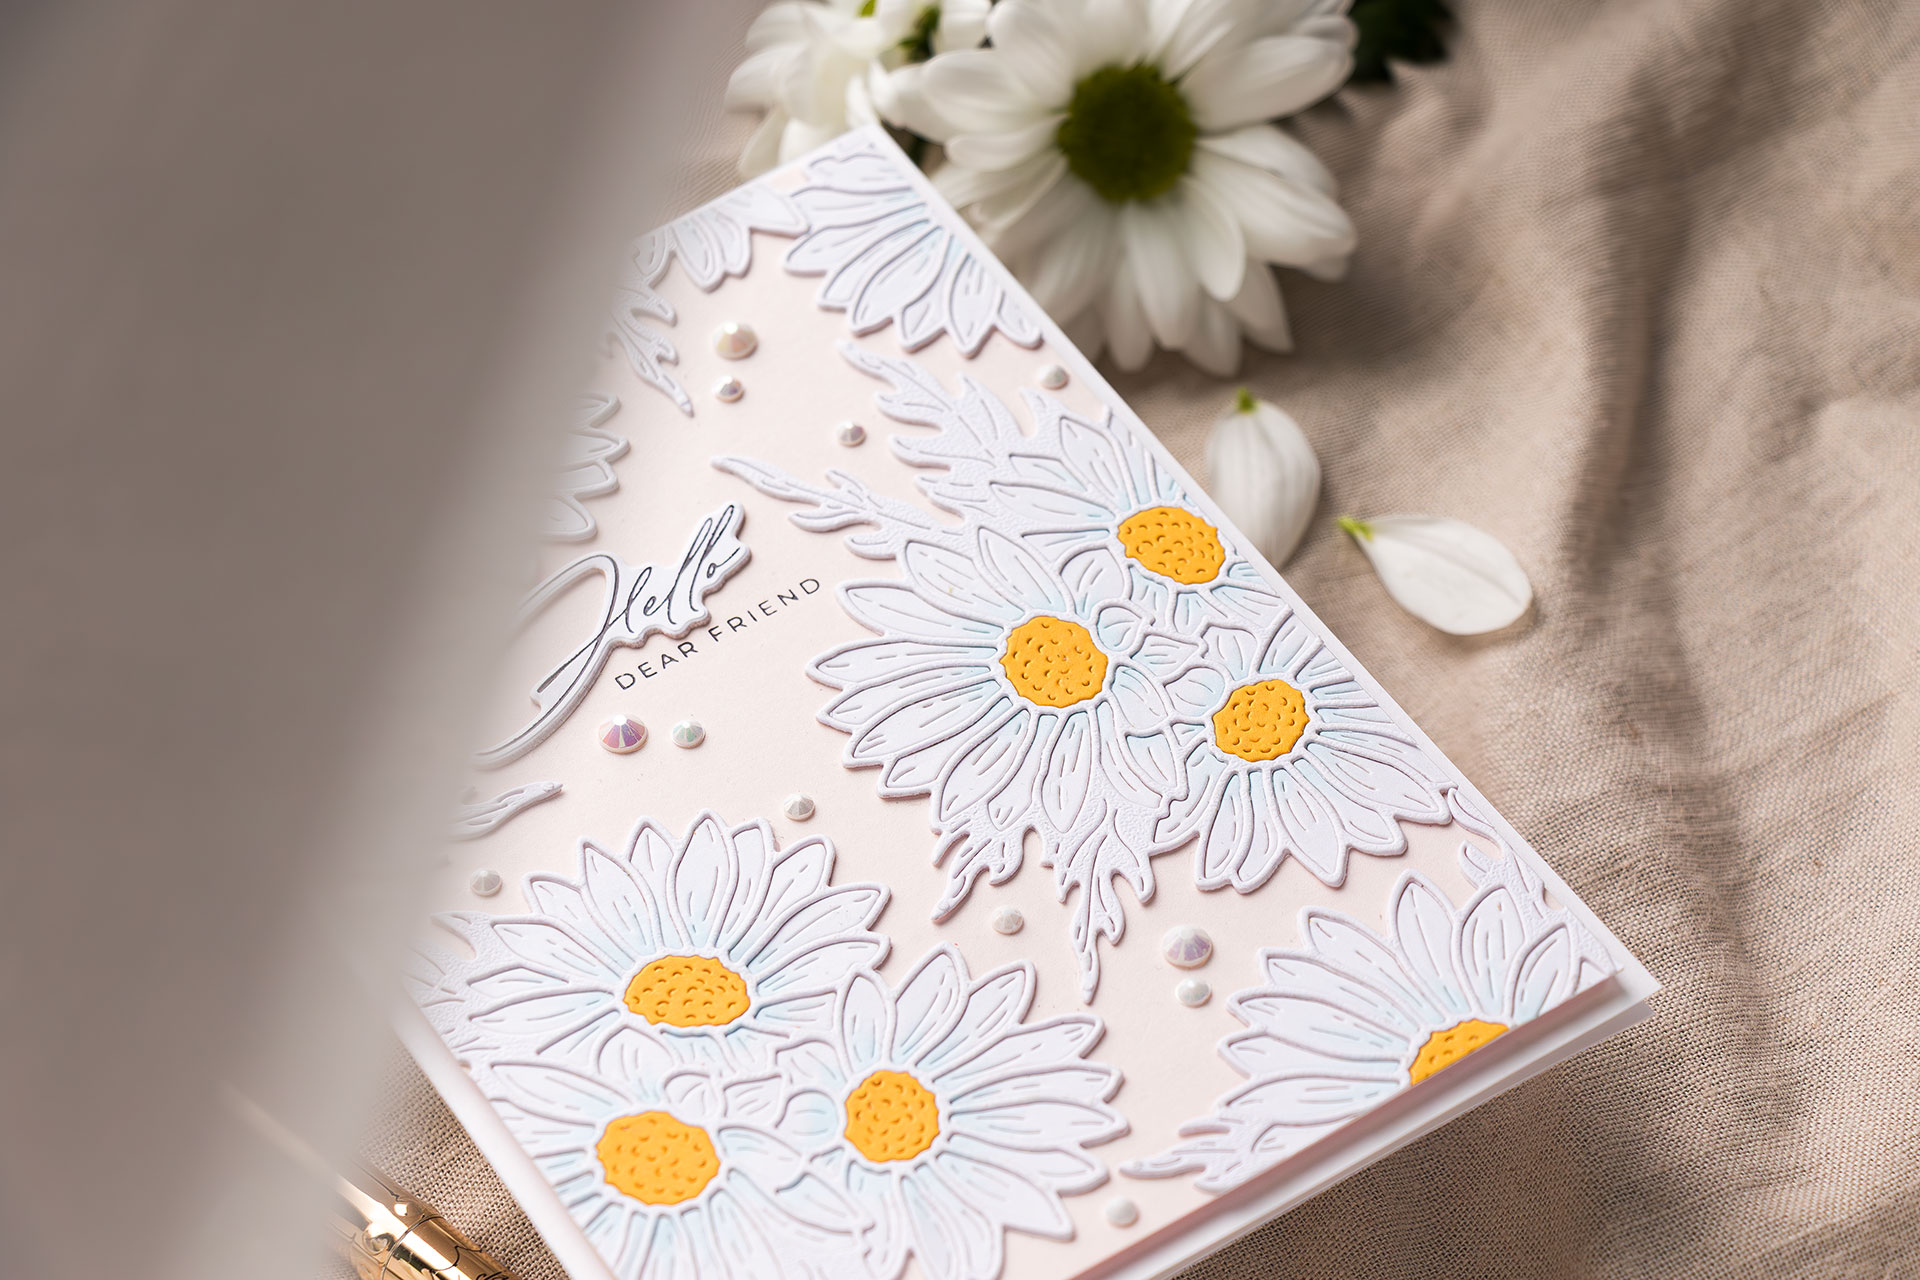
3. Classic White Daisy
For a more traditional look, cut your petals from white cardstock and add a touch of pale blue (try B00 or B000 Copic markers) at the base of each petal. Add a yellow center, and voilà—a classic daisy in bloom!
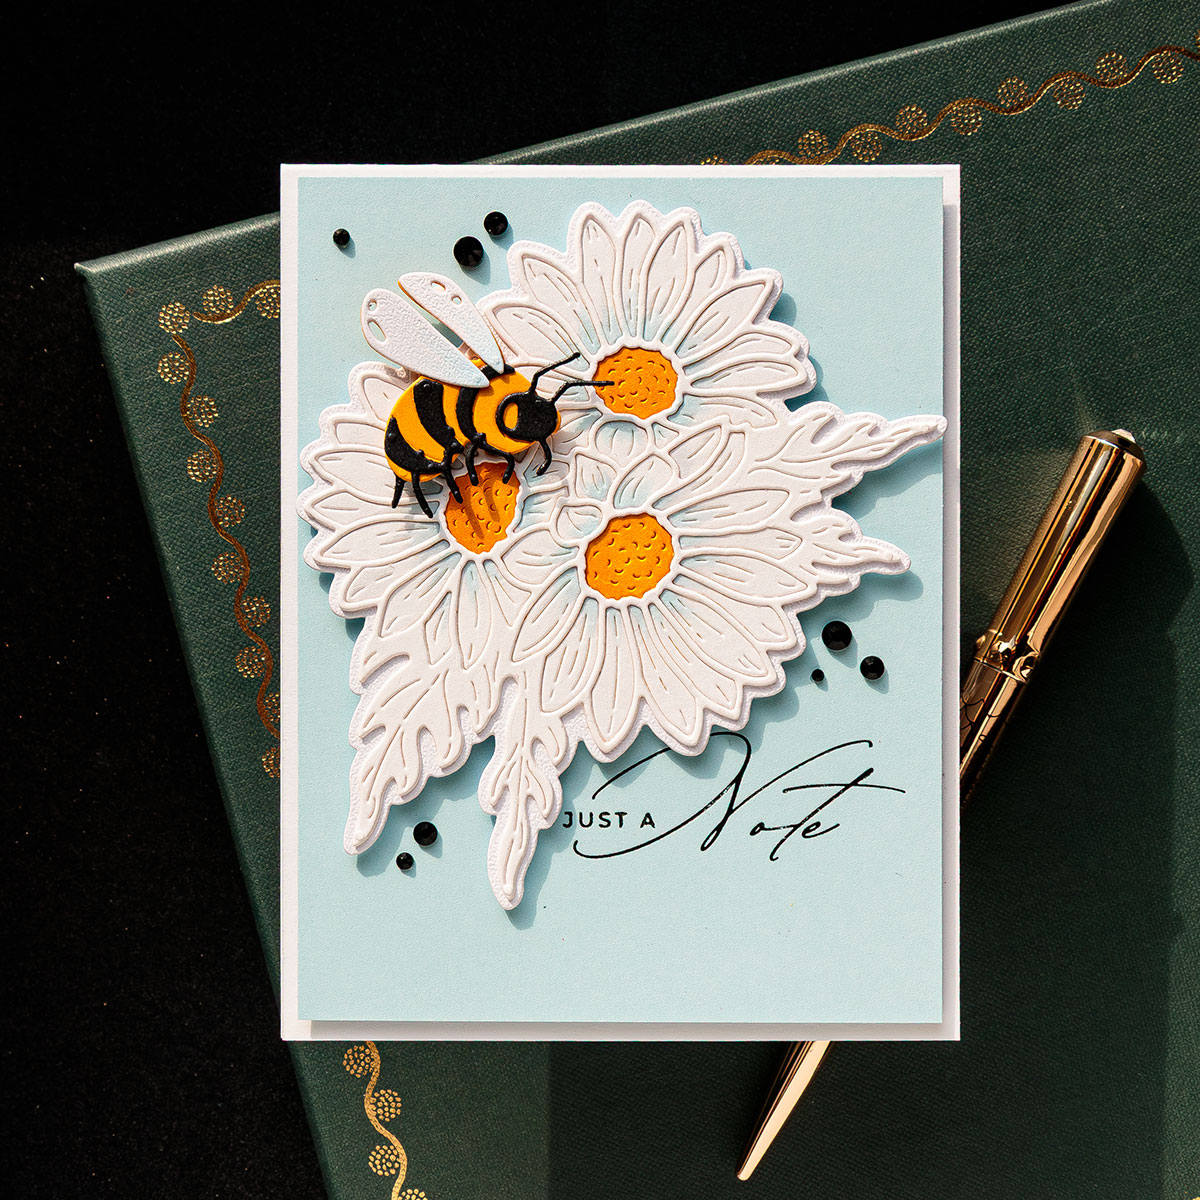
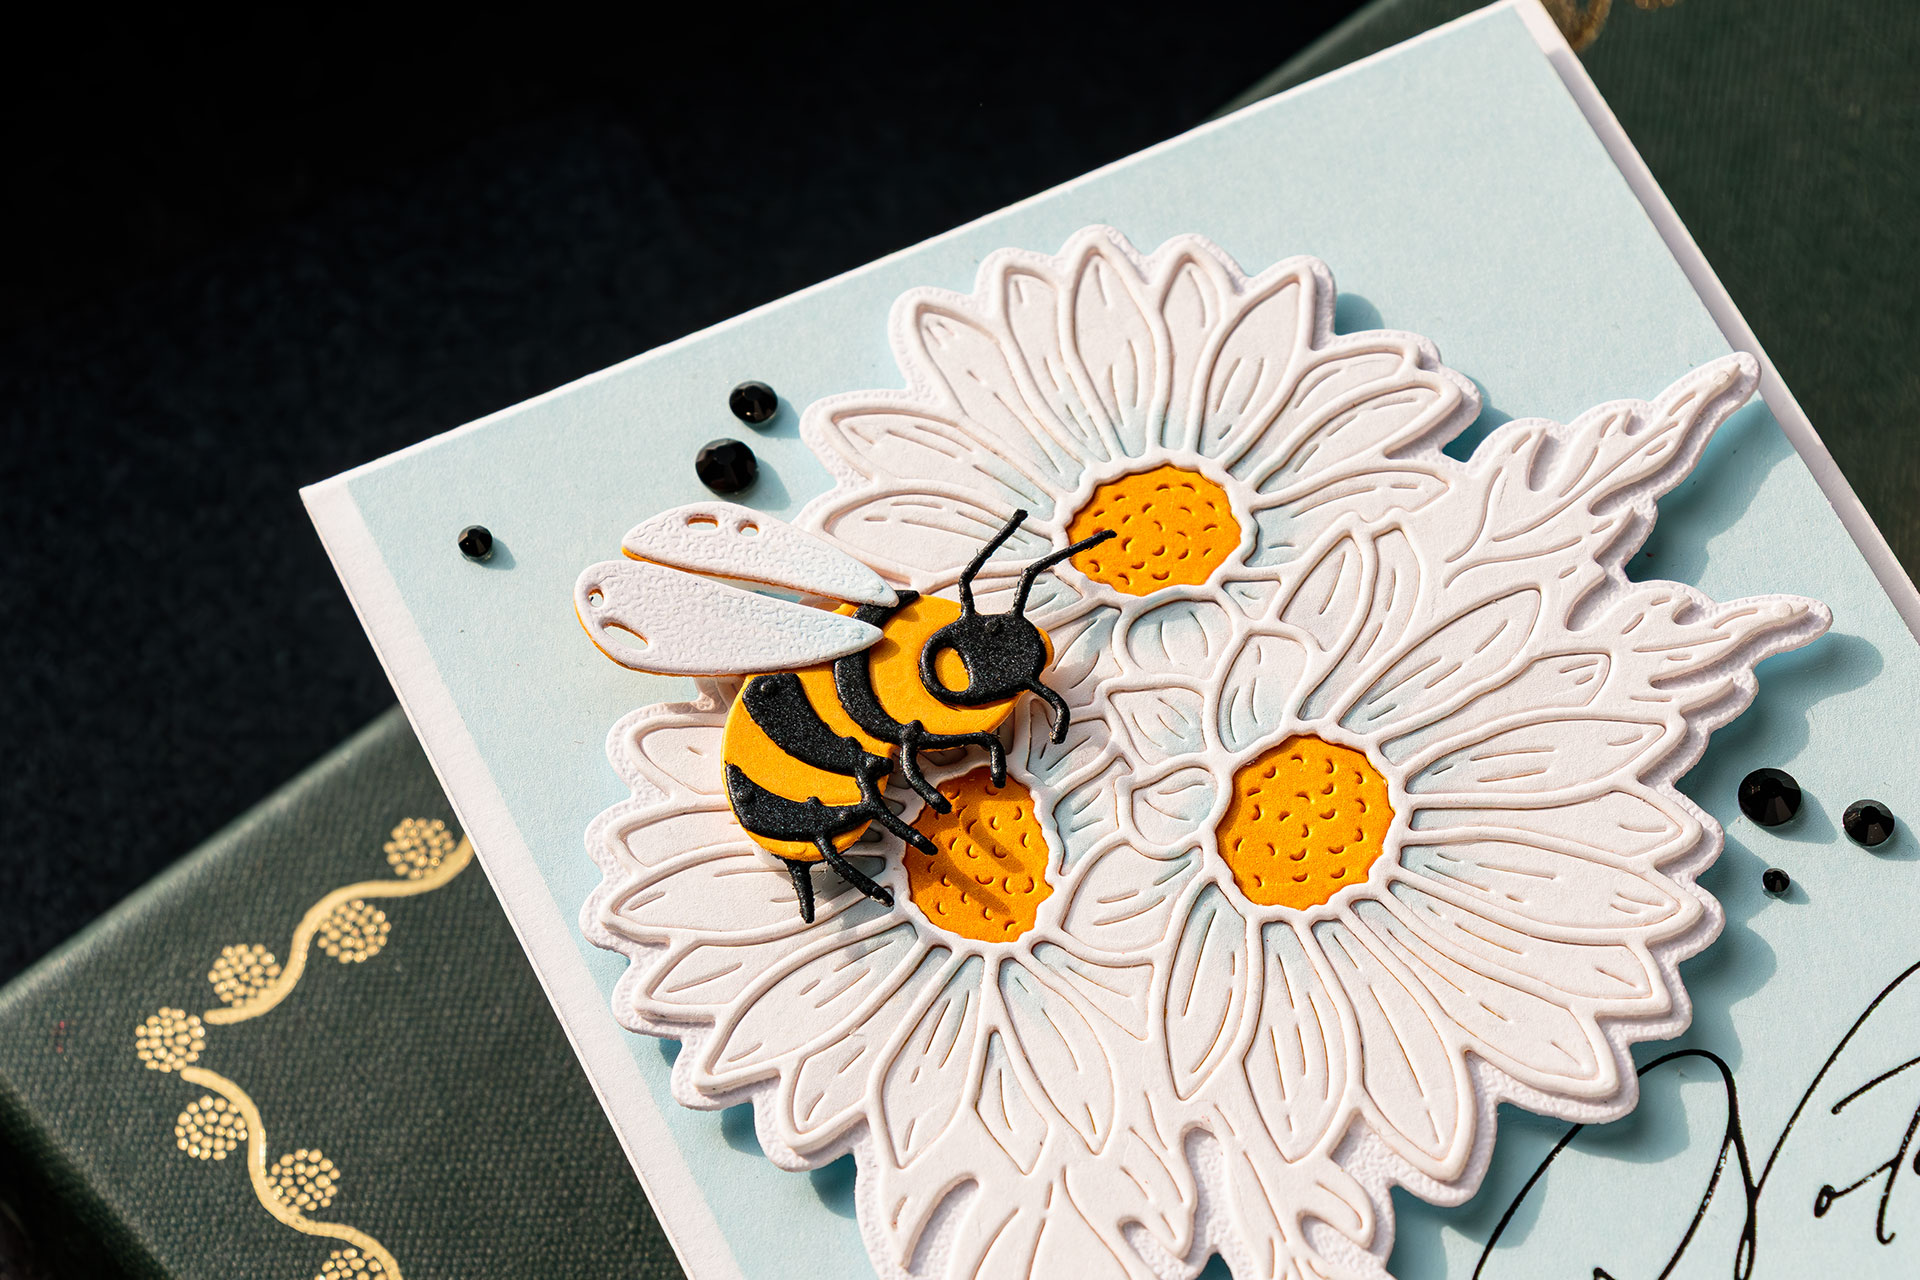
Additional products used: Windy cardstock; Crafty Hugs sentiments; Onyx gems
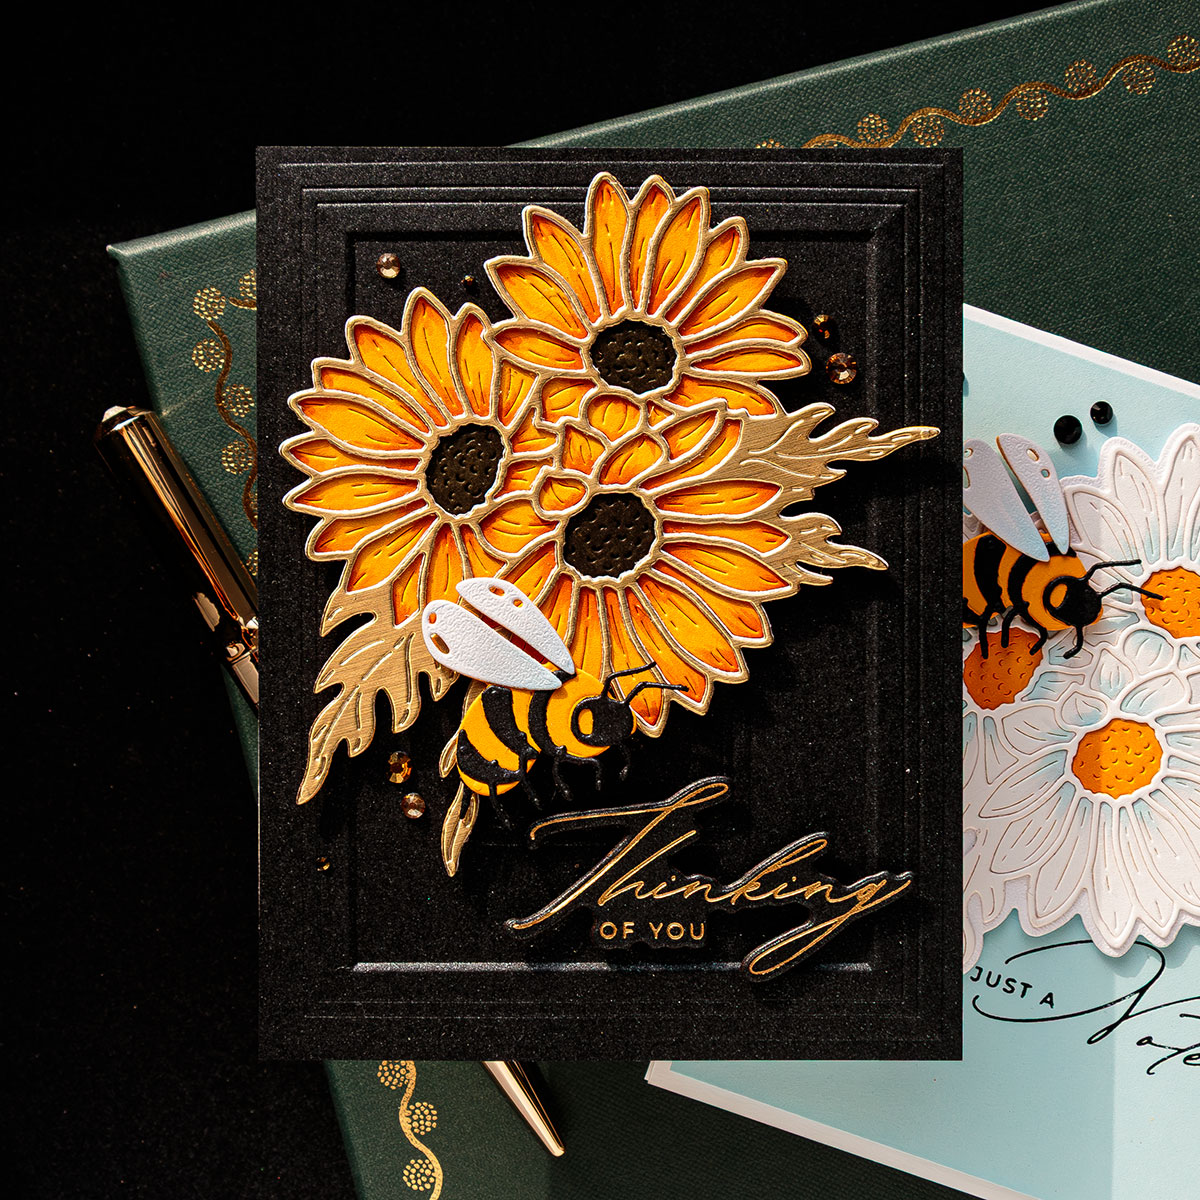
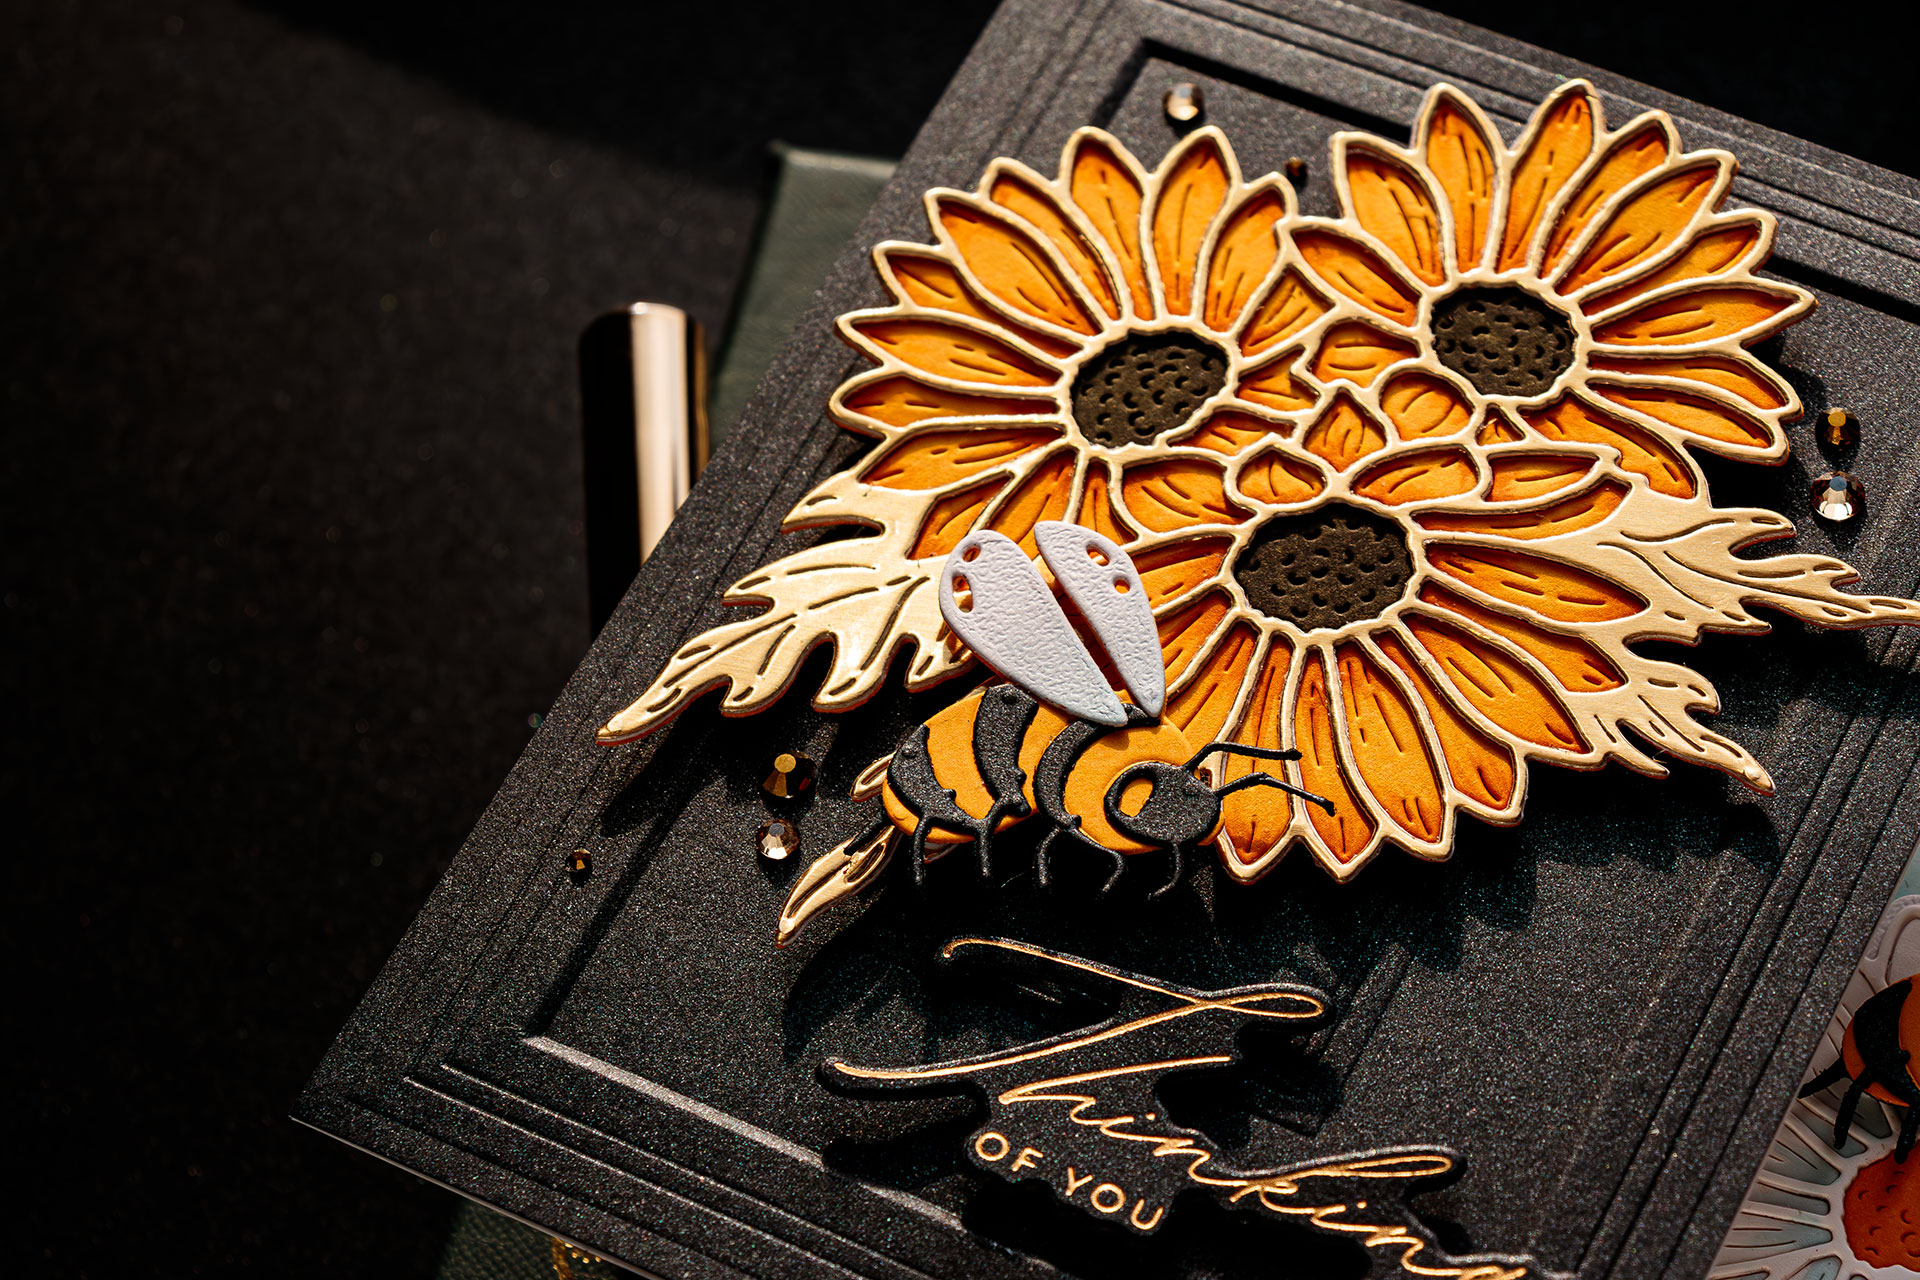
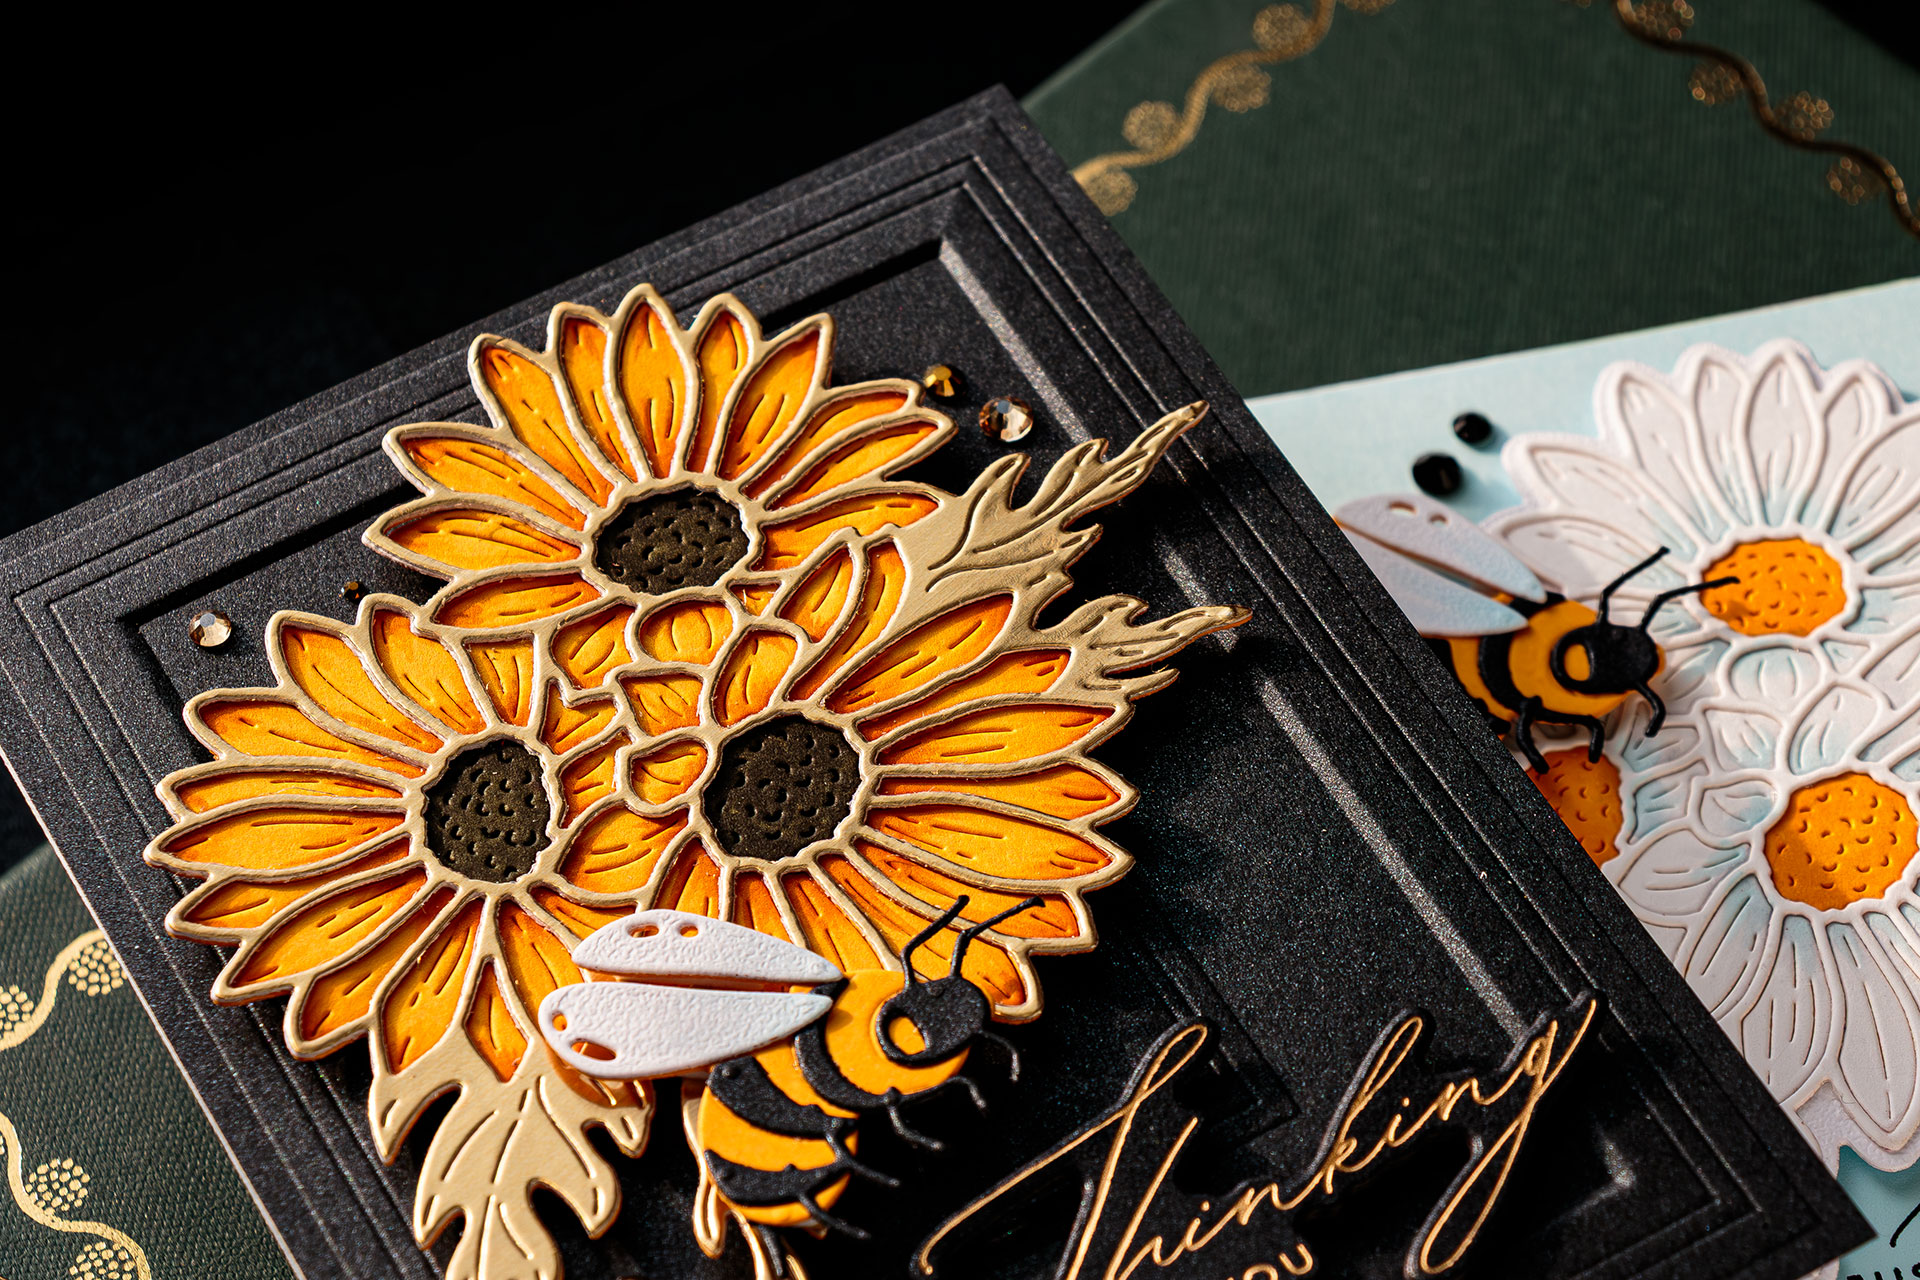
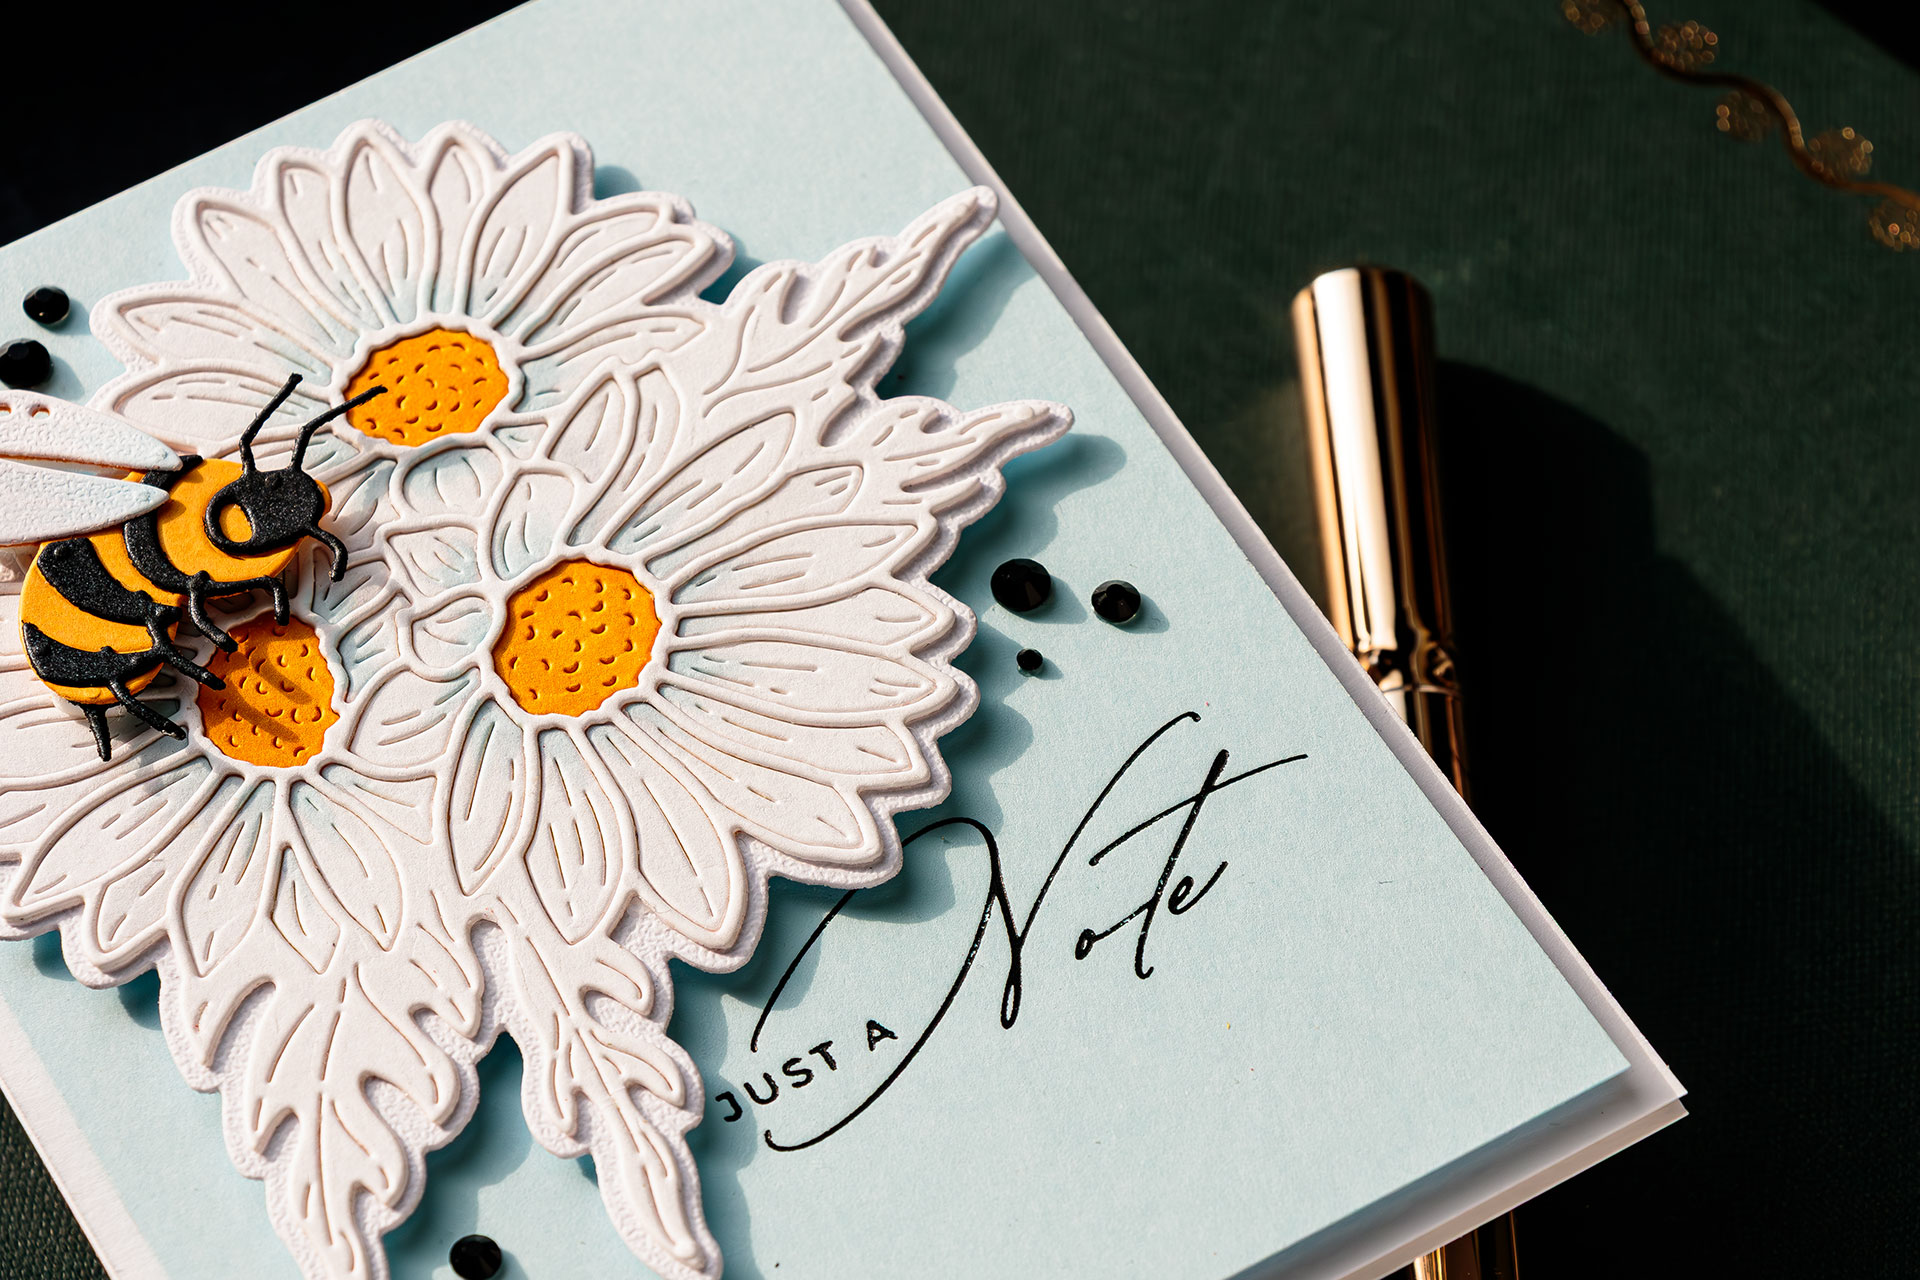
A FEW EXTRAS
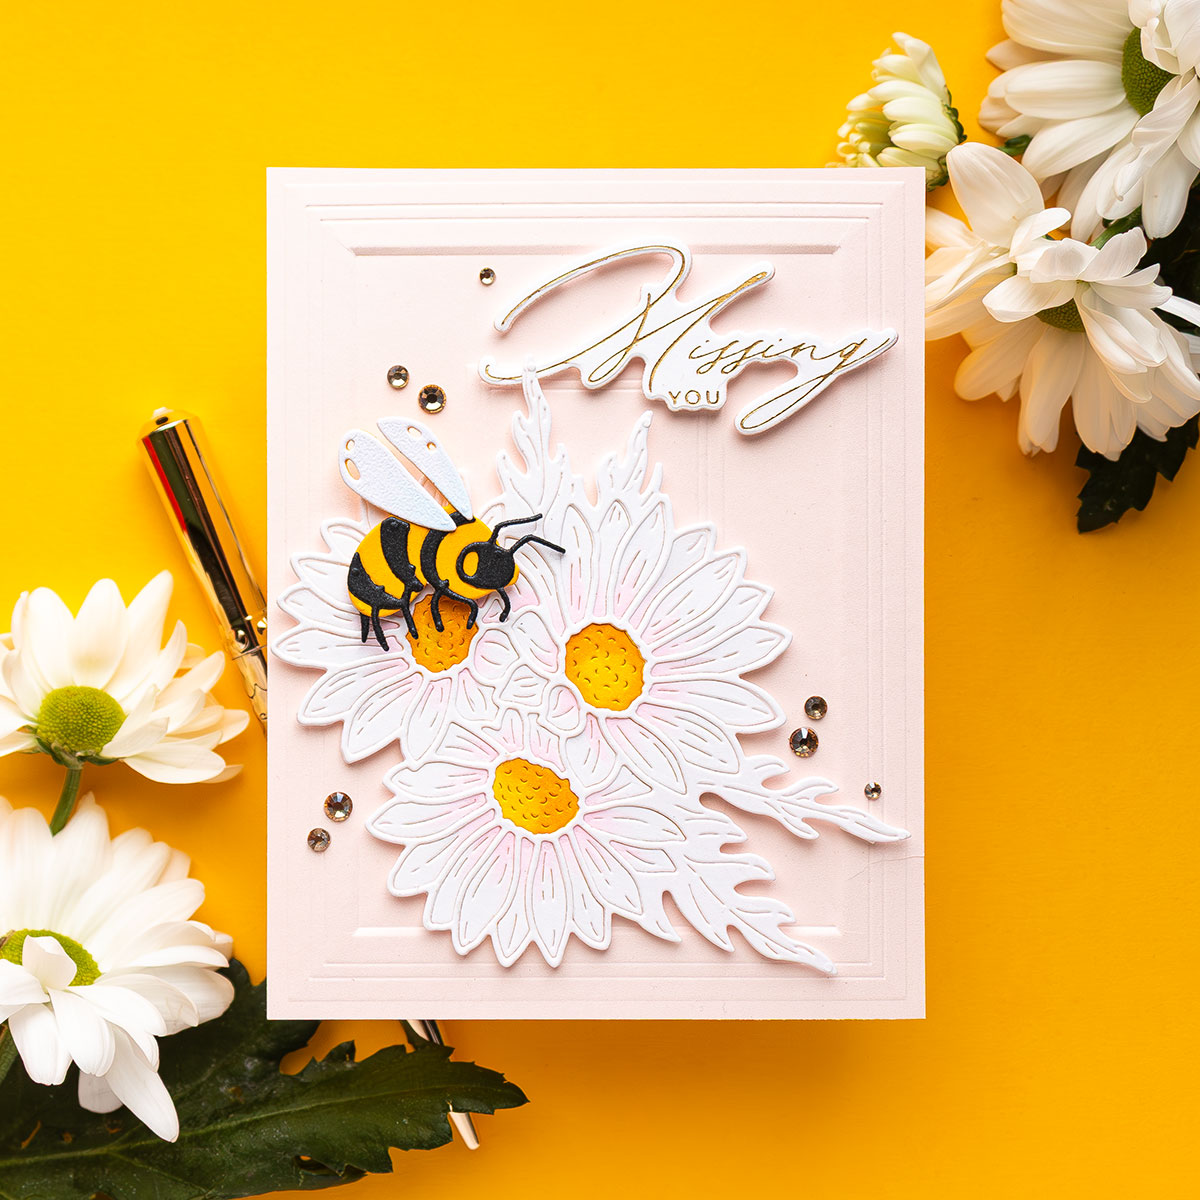
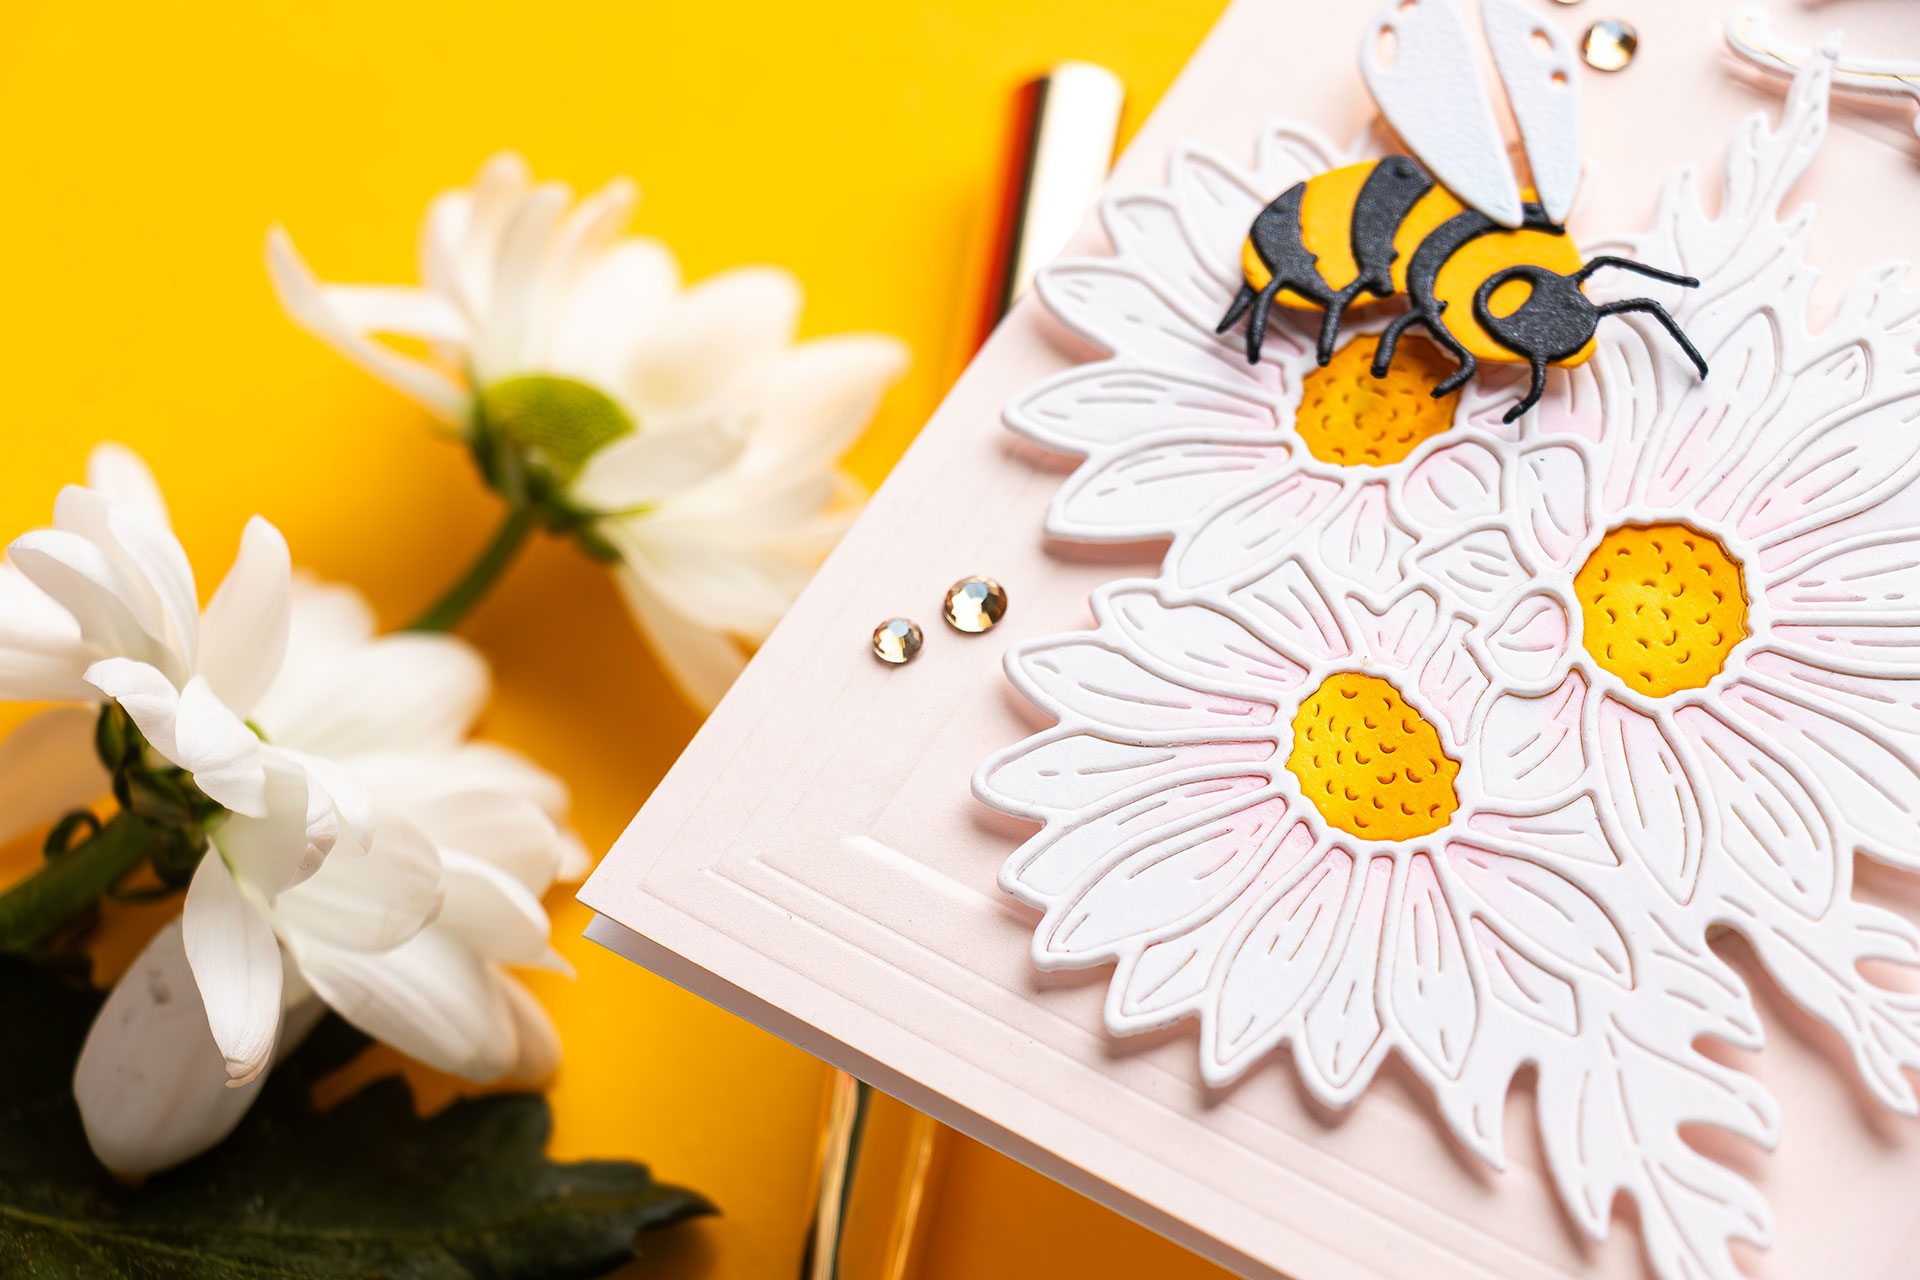
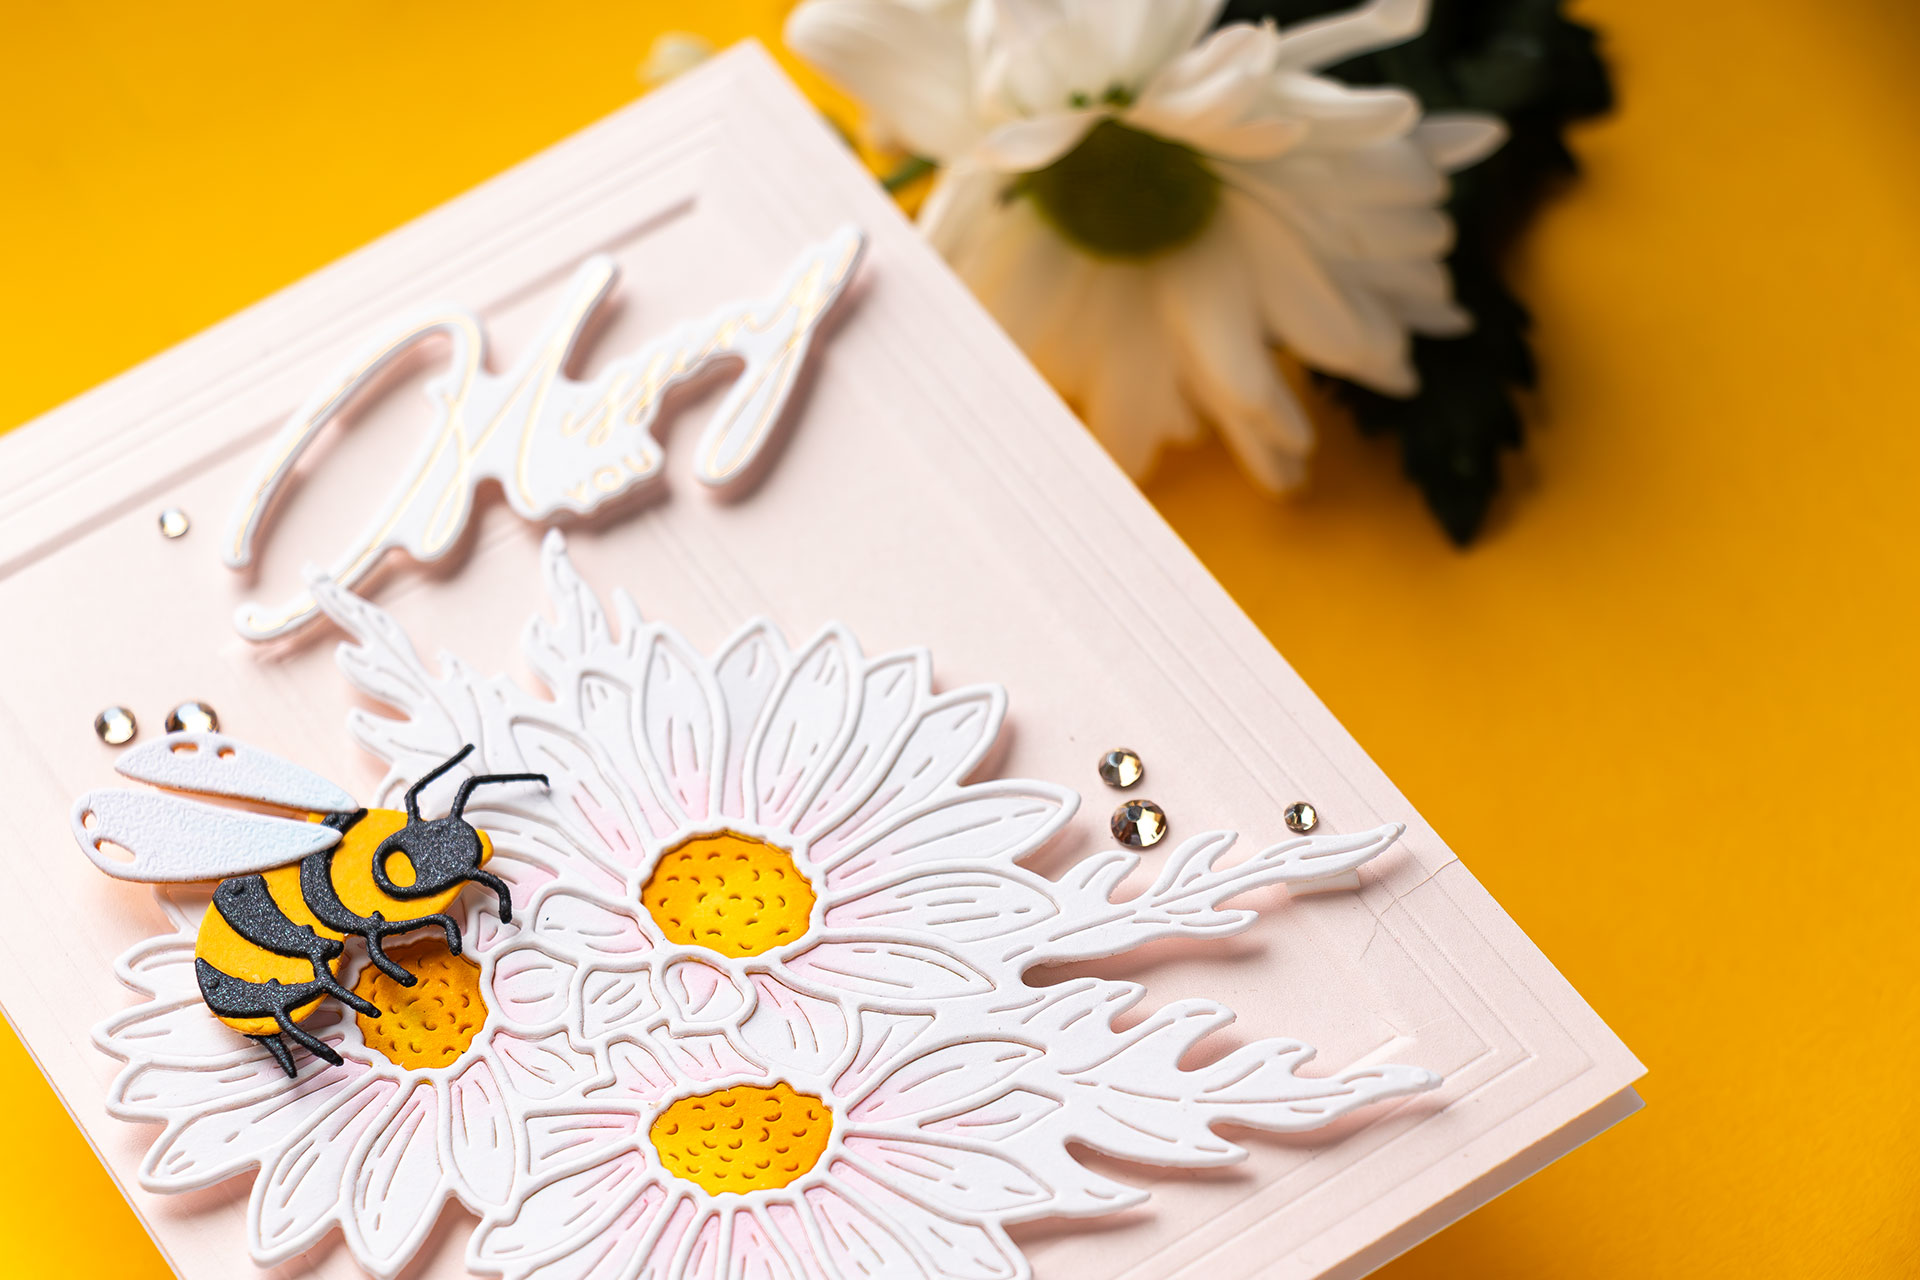
In some of my card examples, you might spot a little bee buzzing near the flowers. That bee is from an older Spellbinders Club kit, but you could use any small insect die – a ladybug would be adorable too!
CARD IDEAS
The daisy die is large enough to fill an A2 card all on its own, which makes it a great focal point. You can also use multiple die cuts to create beautiful floral clusters or even fill an entire 5×7 card background for a more dramatic look.
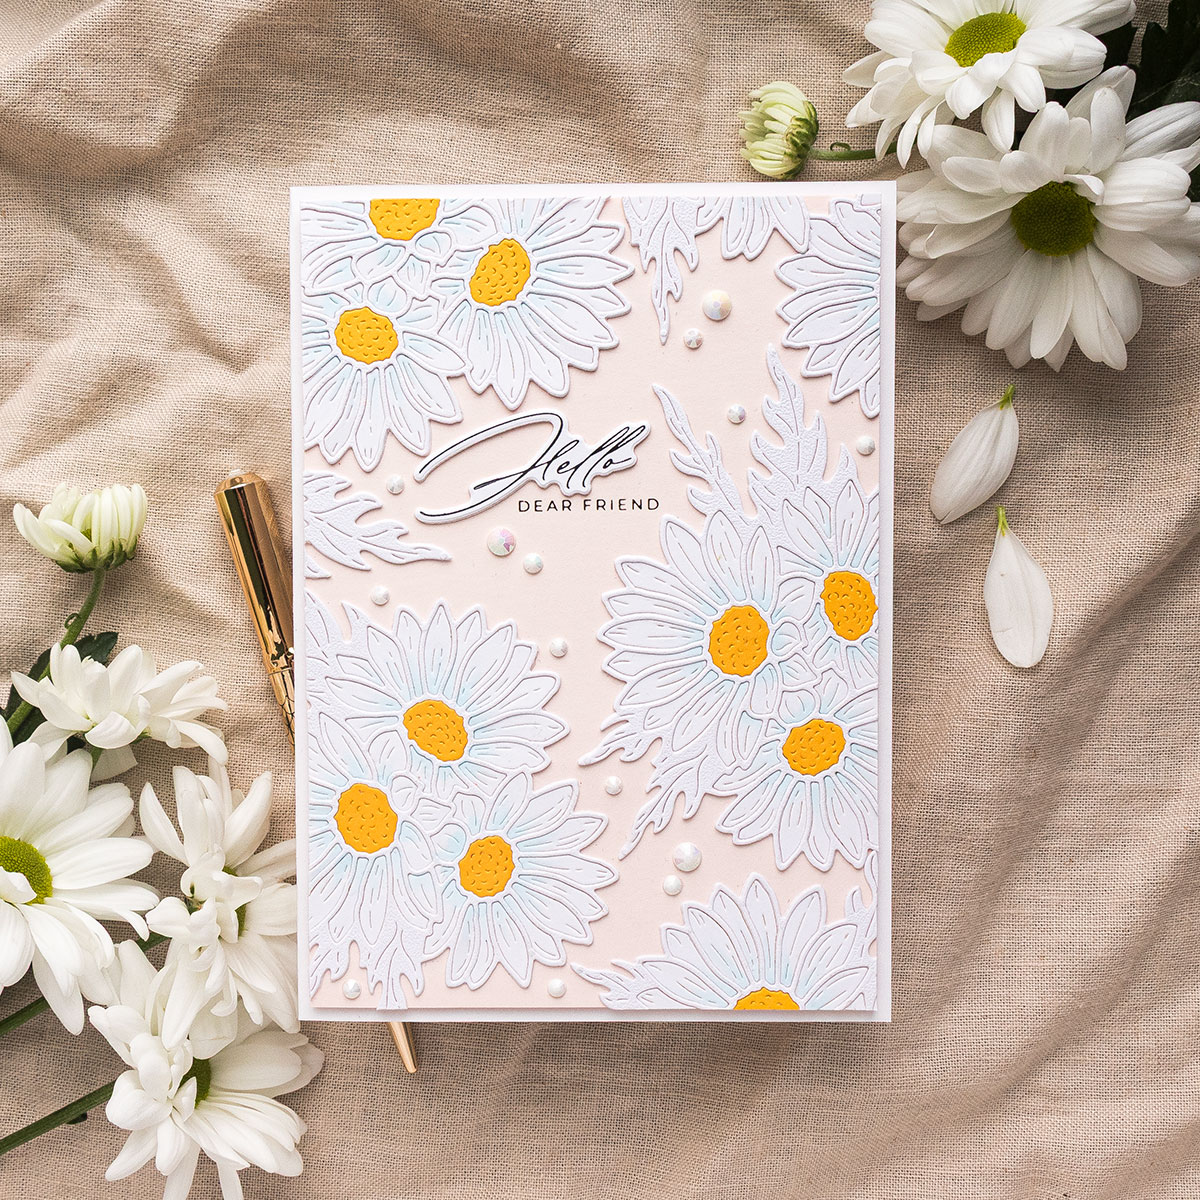
Here’s one of my favorite examples – a 5×7 card with three daisies clustered together for a full, blooming garden effect.
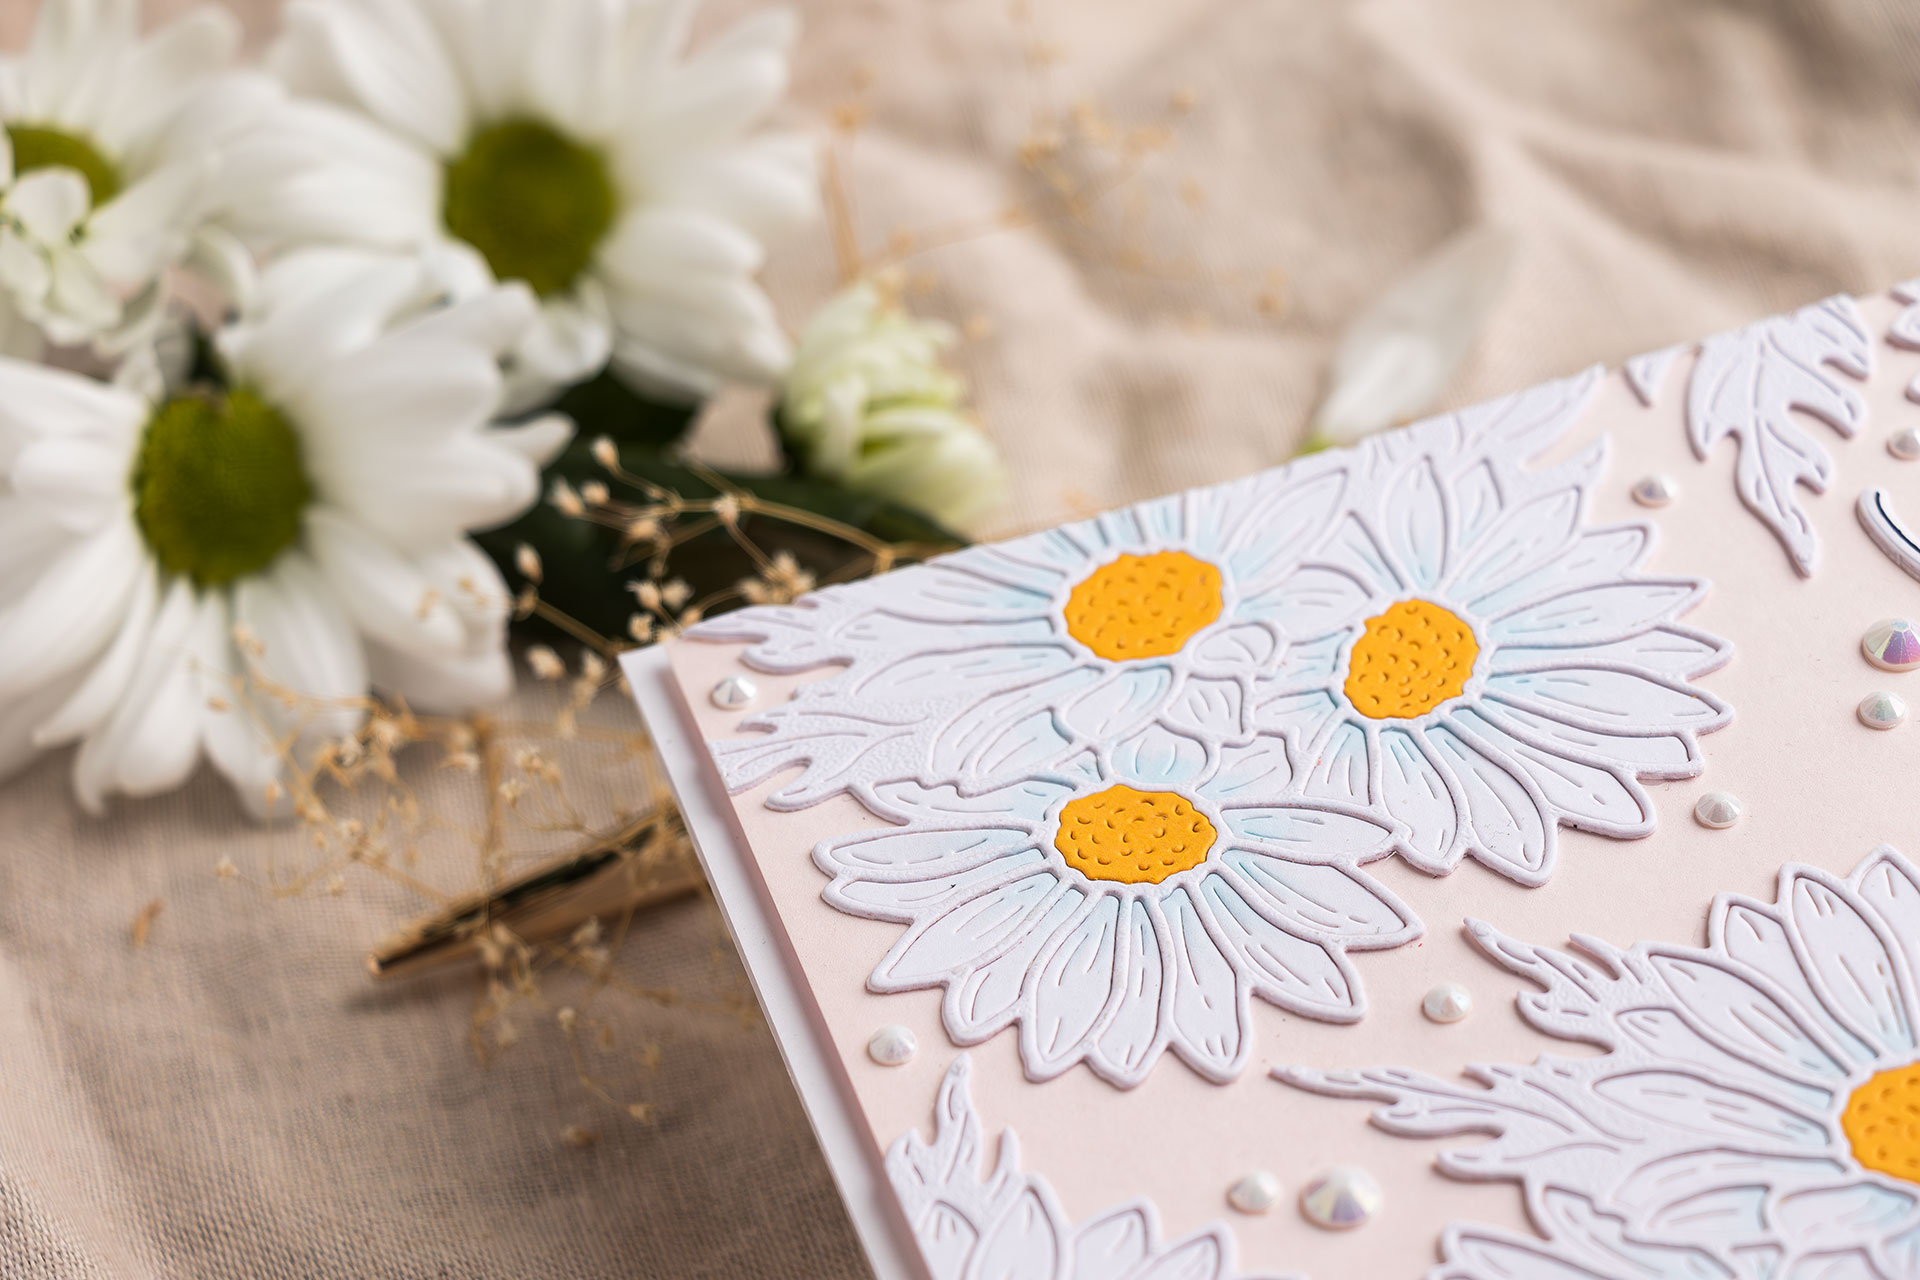
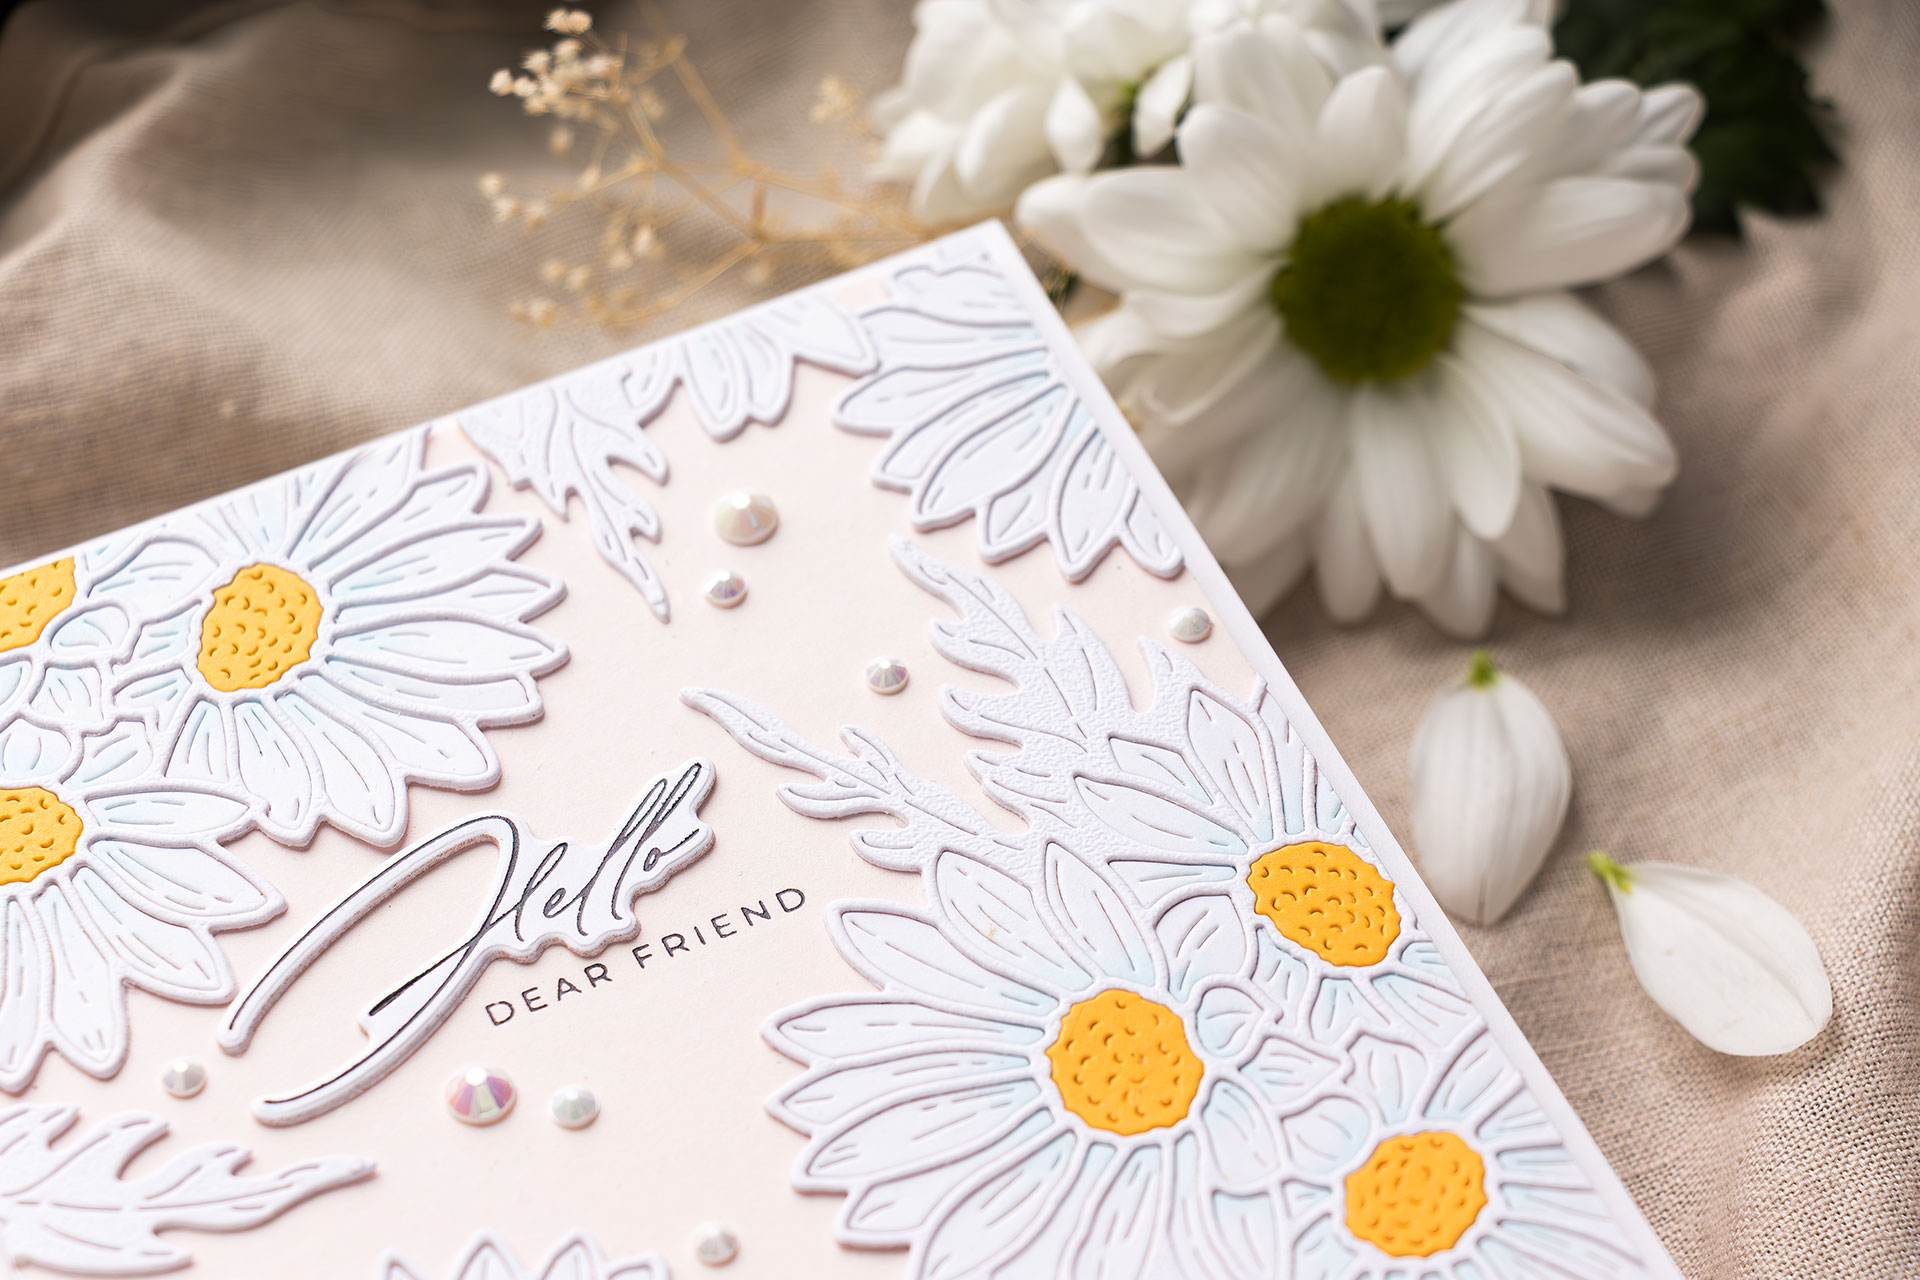

Additional products used: Chiffon cardstock; Crafty Hugs sentiments; Onyx gems; Altenew Mother of Pearl Gems
My last card shows the Daisy die over a beautiful Molded Frame embossed background. The Chiffon cardstock was used for the background. The RV00 Copic marker was used to color the daisy petals pale pink. Gold gems were used to embellish the card.
The Yana’s Daisy Die is such a fun and versatile piece. Whether you’re layering with cardstock, blending ink for soft gradients, or going bold with colorful cardstock, there’s no wrong way to use it. I hope this post gave you a few new ideas to try in your own crafty space.
As always, thank you so much for spending time with me today. You can watch the full video tutorial for this die [here], and be sure to tag me if you create something using it—I love seeing your work!
Happy crafting,
Yana 💛
SUPPLIES
I’m listing the products I used below. Click on the link to go directly to the product. Where available I use compensated affiliate links which means if you make a purchase I receive a small commission at no extra cost to you. Thank you so much for your support!
 Spellbinders Yana’s Daisies Etched Dies Shop at: SC | SB USA | SB UK |
 Spellbinders Crafty Hugs Sentiments Press Plate & Die Set Shop at: SC | SB USA | SB UK |
 Spellbinders Molded Frame 3D Embossing Folder Shop at: SC | SB USA | SB UK |
 Spellbinders Honey Bee Jar – Large Die of the Month Shop at: SB USA | SB UK |
") Spellbinders Glimmer Hot Foil System (Platinum) Shop at: SSS | SC | SB USA | SB UK | AMZ |
 Spellbinders Platinum 6 Machine With Universal Plate System Shop at: SSS | SC | SB USA | SB UK | AMZ |
 Spellbinders Glimmer Hot Foil 2 Rolls – Opaque Black & White Pack Shop at: SSS | SC | SB USA | SB UK |
 Spellbinders Brushed Black Cardstock Shop at: SC | SB USA | SB UK |
 Spellbinders Gold Assortment Treasured Cardstock Shop at: SSS | SB USA | SB UK |
 Spellbinders Glimmer Hot Foil Roll – Gold Shop at: SSS | SC | SB USA | SB UK | AMZ |
 Spellbinders Brushed White Cardstock Shop at: SC | SB USA | SB UK |
 Spellbinders Windy ColorWheel Cardstock Shop at: SC | SB USA | SB UK |
 Spellbinders Saffron ColorWheel Cardstock Shop at: SC | SB USA | SB UK |
 Spellbinders Beeswax ColorWheel Cardstock Shop at: SC | SB USA | SB UK |
 Spellbinders Chiffon ColorWheel Cardstock Shop at: SC | SB USA | SB UK |
 Spellbinders Classic White ColorWheel Cardstock Shop at: SB USA | SB UK |
 Simon Says Stamp Pawsitively Saturated Ink Pad Citrine Shop at: SSS |
 Spellbinders Tool ‘n One – White Shop at: SSS | SC | SB USA | SB UK | AMZ |
 Copic Sketch Marker Y35 Maize Shop at: SSS | AMZ | WF |
 Copic Sketch Marker RV00 Water Lily Shop at: SSS | AMZ | WF |
 Copic Sketch Marker Y19 Napoli Yellow Shop at: SSS | AMZ |
 Copic Sketch Marker YR14 Caramel Shop at: SSS | AMZ | WF |
 Copic Sketch Marker YG03 Yellow Green Shop at: SSS | AMZ | WF |
 Copic Sketch Marker B00 Frost Blue Shop at: SSS | AMZ | WF |
 Spellbinders Onyx Mix Color Essential Gems Shop at: SSS | SB USA | SB UK |
 Altenew Mother of Pearl Gem Sparkles Shop at: AN |
 Spellbinders Gold Mix Color Essential Gems Shop at: SSS | SC | SB USA | SB UK |
 Bearly Art Mini Precision Craft Glue Shop at: SSS | SB USA | AMZ |
 White Foam Squares Shop at: SSS | SC | SB USA | SB UK | AMZ |
 Glassboard Studio Super Strong Magnets Shop at: GBS |
 Glassboard Studio Glass Craft Mat – Code YANA15 Shop at: GBS |
 Spellbinders Best Ever Craft Tape Shop at: SSS | SC | SB USA | SB UK | AMZ |
 Acrylic Tape Dispenser Shop at: SB USA |
Amazing crds and big congrats on your new collection